Green Thumb

Hi everyone!

Ok, ok, OK! It has been too long. I know. I took a crazy long leave of absence… er, Wreath-ernity leave? Is there such a thing? Haha, well basically I spent the last month making a crazy amount of wreaths. What have you been upto? Would it be awkward if we had an internet hugging session? Life pretty much got in the way. It happens.

I also did some gardening (as much as one person can do on a balcony). And, anyone who knows me, knows that this does not come naturally. I’ve received beautiful orchids as gifts in the past, and have killed them almost within the month. I’m thinking I over watered them, quite possibly. Anyway, until recently I had sentenced myself to faux plants (I say faux because it sounds more classy than fake and plastic). But really, it’s not the same.

So I thought what the hey, let’s see what Momma can grow. I would like to tell you that I went to a garden centre, or spoke to someone who has the faintest passion or intellect towards plants, but no, this chick lives downtown and went to her nearest Loblaws (er, Lo-blahs). Ya, they didn’t really have a huge selection, but I did find some pretty little blooms in my balcony’s colour scheme :).

Also, I should add that my balcony poses two challenges:

  • I only receive about 3 hours of direct afternoon sun. The rest of the day is sunny, but not direct exposure.
  • It is an enclosed balcony, so there isn’t anything in terms of rain… and I tend to kill plants that I have to water myself.
  • The plants needed to be critter friendly. My kitten is a monster who eats and attacks everything.
  • As per usual, I’m on a budget. So the plants needed to be somewhat cheap, I mean, affordable.

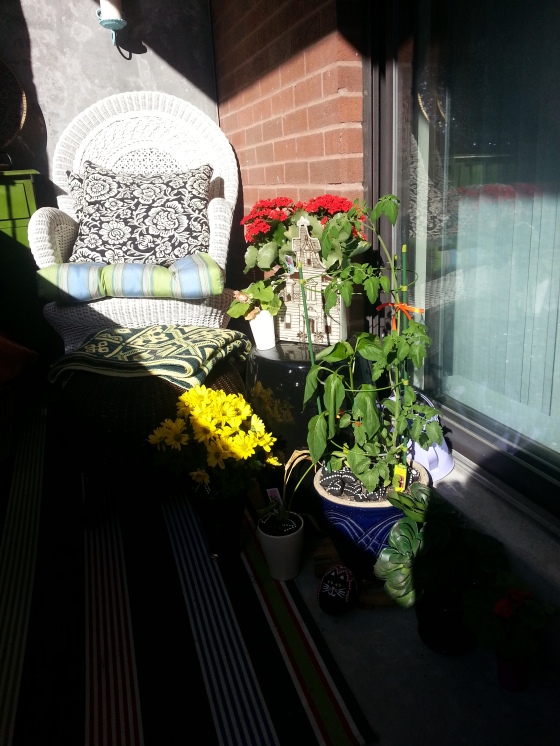
I believe that is pretty much it. Here’s a picture to illustrate just what I’m talking about in terms of sunlight. I should also add that the sun I do get, is about a two foot by one foot patch.

028

Not a huge amount of light. But hey, we work with what we got in life, don’t we?

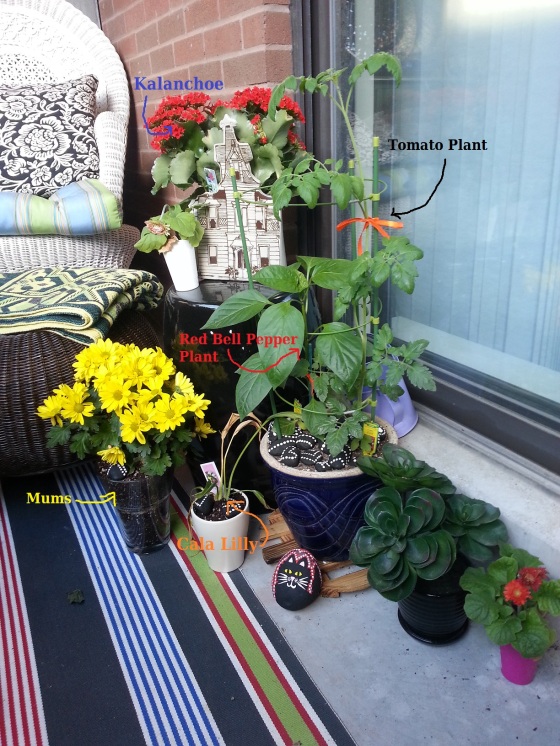
Here’s a layout of what each plant is:

garden1

That photo was taken after the sun had moved on. Yes, I now realize that I have spelt Calla Lilly incorrectly. Damn!

The light may look nice and even, but unfortunately it was pretty shady. (Slim shady reference anyone?)

026

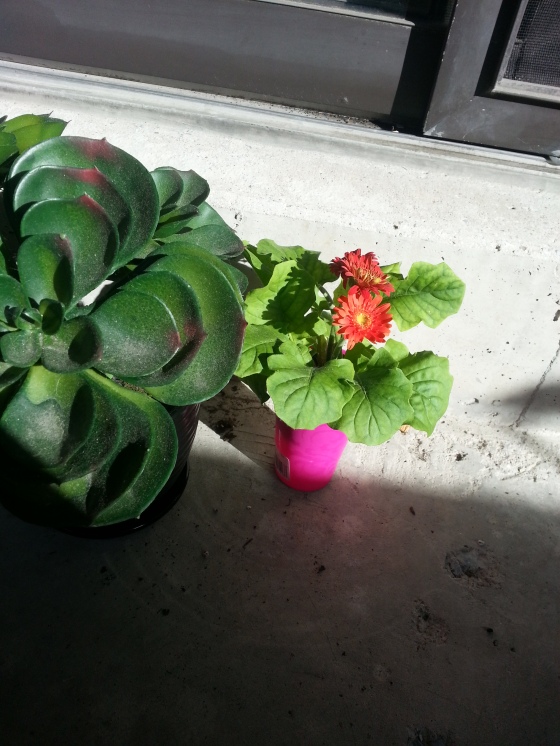
If anyone knows the name of the plant on the right, do share (I’ve lost the tag). The plant on the left is a sneaky, faux imposter! (Whom sometimes I forget is an imposter and occasionally water.)

037

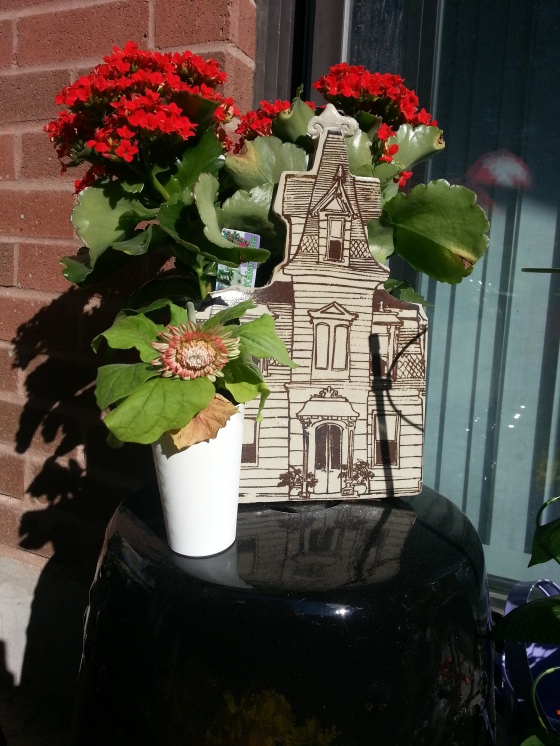
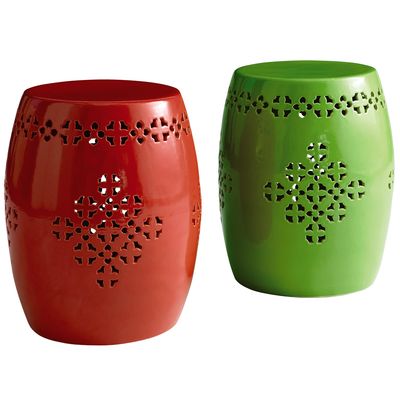
That pot shaped and painted like a house was a garage sale find for $1.00. The black Chinese urn was bought from Winners on clearance for $10.00. It was originally an off white and was pretty badly scuffed up. I found a very similar product being sold at Pier1 imports for $99.95 American.

pier1

http://www.pier1.com/Outdoor-Garden-Stools/PS29387,default,pd.html

They’re cute, don’t get me wrong, but Momma’s on a budget!

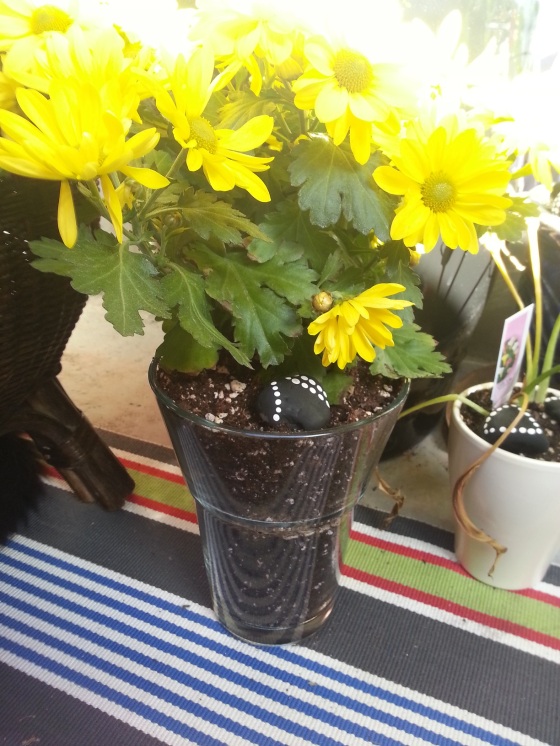
mums

Here’s a pretty picture of the Mums’ with sunshine beaming through.

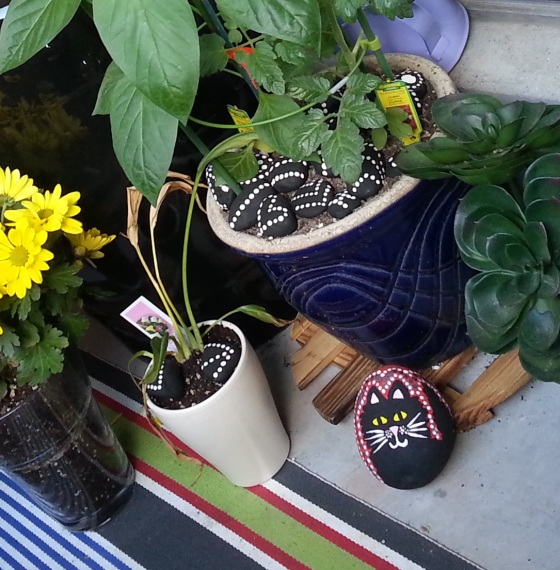
painted rocks

I also painted some dollar store rocks with acrylic paint and scattered them throughout the base of the plants.

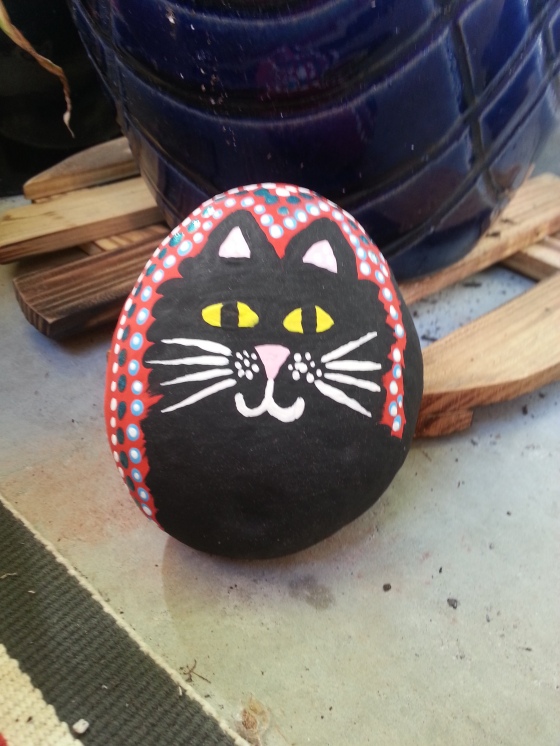
024

I painted a larger rock that I “found” on my walk home from work to look like baby Jack. The resemblance is really uncanny.

Well there you have it. That’s my garden. It’s no Royal Botanical Garden by any means, but I still like it. Have you been doing any gardening lately? Are you dealing with any challenging gardening on balcony situations?

I will end this post with a cutesy, self-indulgent kitten picture.

professor cuteness

Don’t laugh. He has a stigmatism.
D.I.Y. Summer Wreath made from Pool Noodle

Good evening everybody!

Soooo, I chose the coldest day in May to make a cutesy summer wreath. I’m serious. It freakin’ snowed today. IN MAY.

I’ve been meaning to take on this project for quite some time. The door to our apartment is pretty blah, and since we are renters, there isn’t too much we can do about it. If I had it my way (and owned the apartment), I would paint the door a bright, happy colour. Take that condo board! You can’t control me. That’s what I’d say. (ya, right).

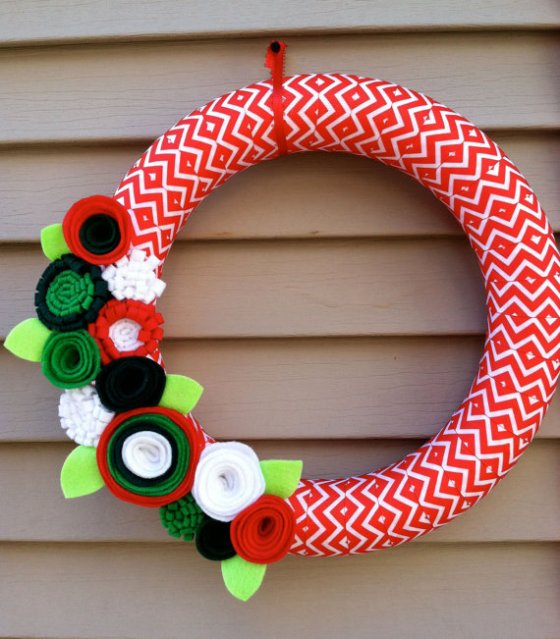
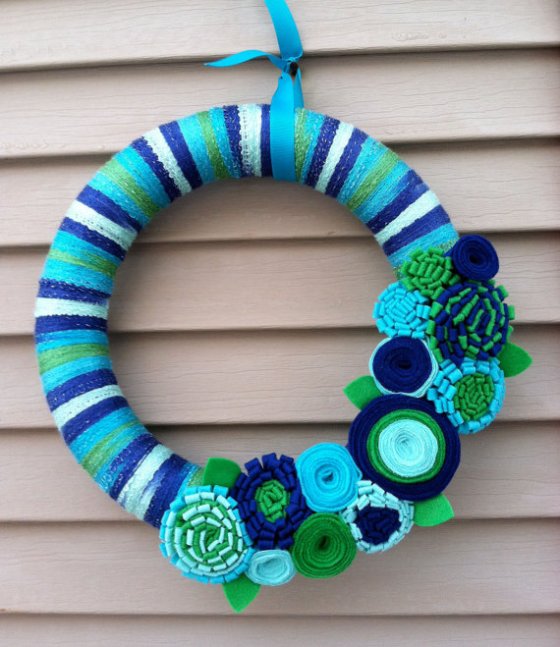
But before I show you my take on the summer wreath, allow me to dazzle you… to explode your crafty senses… get ready… I hope you have a couple of hours to kill, because after seeing these beauties, you’re going to want to make your own. But have no fear, I think it’s a very doable DIY. 🙂

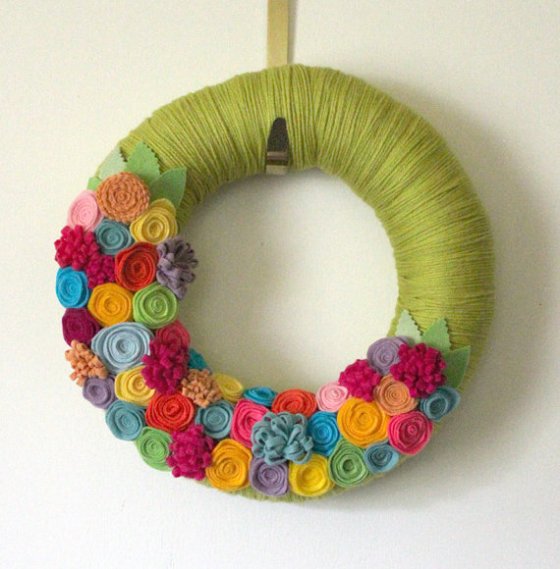
Andrea Ehret (an etsy shop owner), has produced these lovelies:

andrea ehret

andrea ehret1

andrea ehret2

I love the use of pattern and bright colour schemes. So perfect.

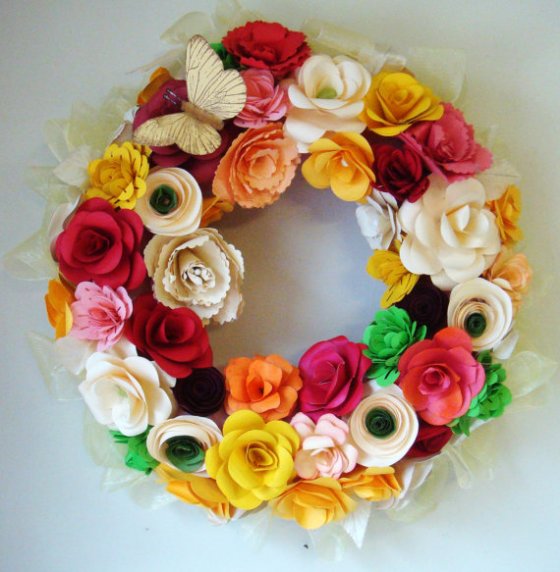
Annie Farber’s paper flower wreaths are so intricate and cheerful. They totally blow the senses.

annie farber

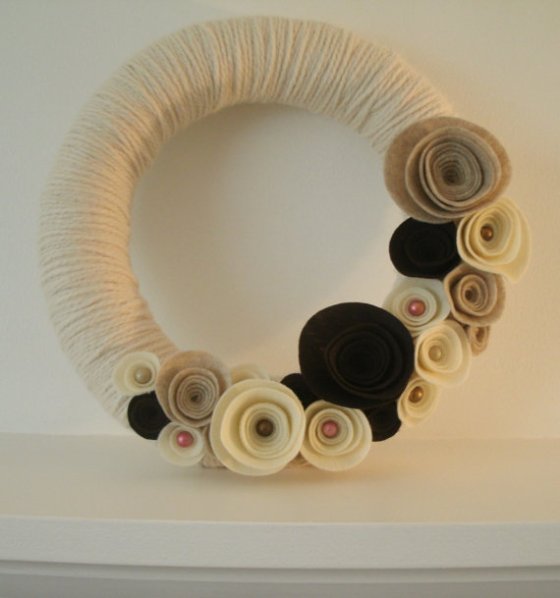
I adore this neutral wreath that Brooke Halas created. What an understated gem.
brooke halas

I think it would look absolutely stunning on the right door.

Ella Bella Mac Designs makes some incredibly beautiful and whimsical pieces. I love the incorporation of hemp, twine, and faux birds.

ella bella mac designs

ella bella mac designs1

ella bella mac designs2

Absolutely stunning. The small details such as the use of gems, and intricate flowers are pure perfection. My hats off to you!

I love how Shannon Tinstman used complimentary colours in this wreath. Stunning! I think it would look darling in fall.

Shannon Tinstman

And last, but not least, Nancy Andrews. I love the punches of colours in that cluster of flowers. It reminds me of jelly beans… lovely!

nancy andrews

So precious. I would love it on a door leading into a little girls room.
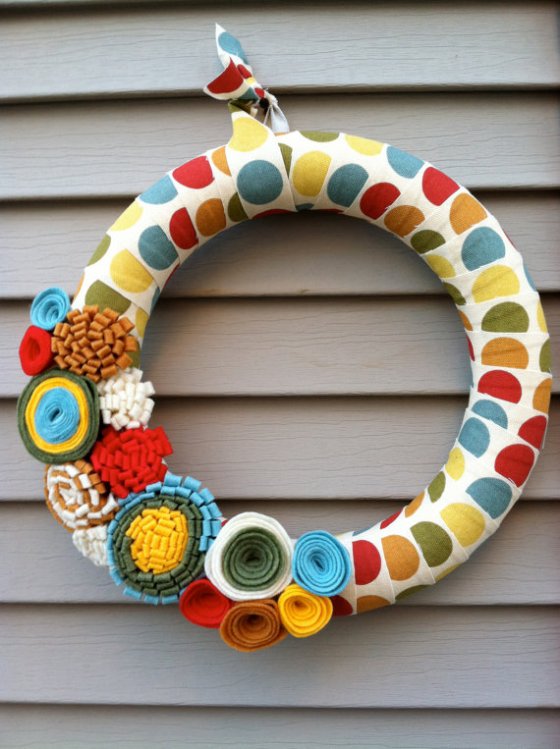
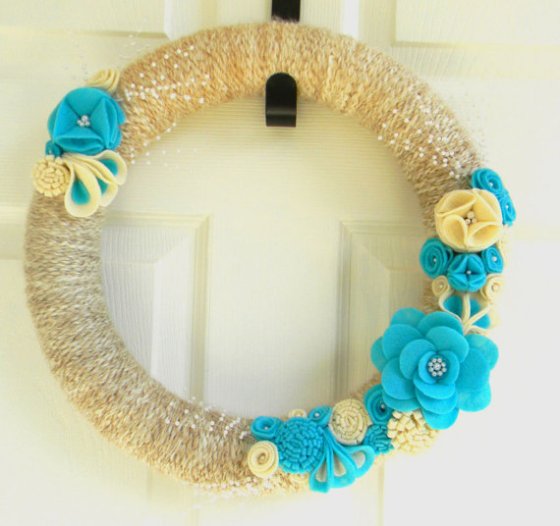
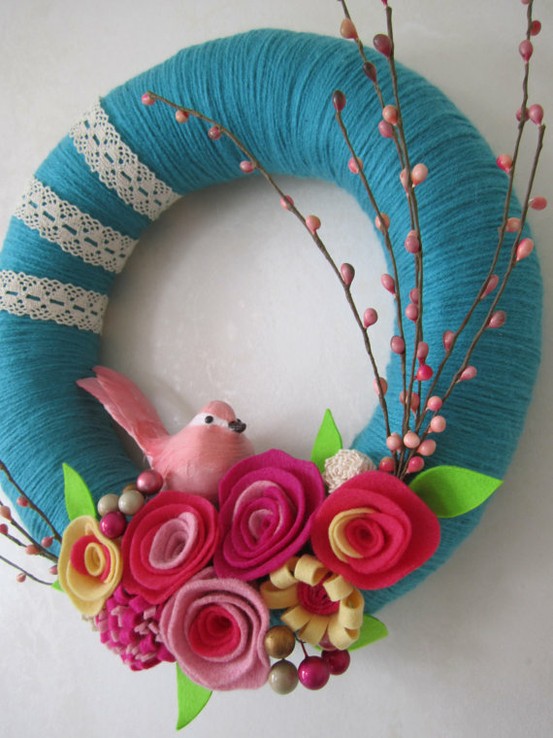
Does anyone else get this excited over wreaths? Haha, I hope so! So, out of the whole bunch, I loved this one the most. And unfortunately, I’m not sure who made it. I found it on etsy awhile back and the colours blew me away. You know how I love turquoise and pink.
spring wreath

I love everything about it. So I decided to try my hand at it. I hope mine doesn’t look like child’s play compared to those ones!

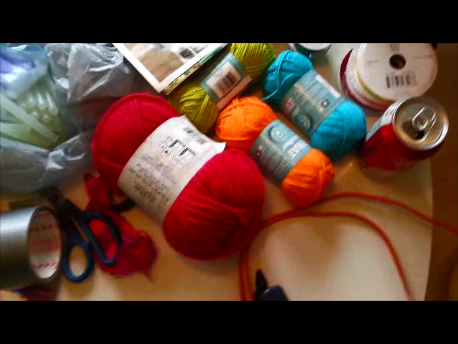
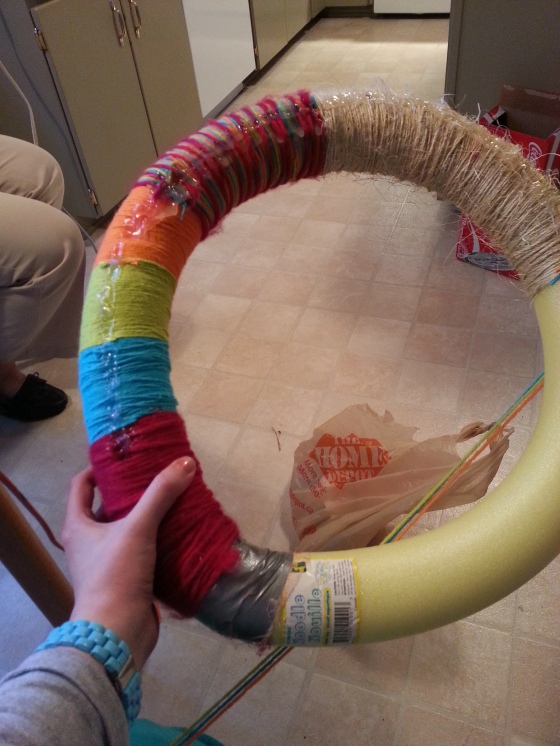
Naturally, I hit up my local Dollar Store for supplies. I had the essentials… like a glue gun, an assortment of buttons, duct tape, etc.

My main purchases were:

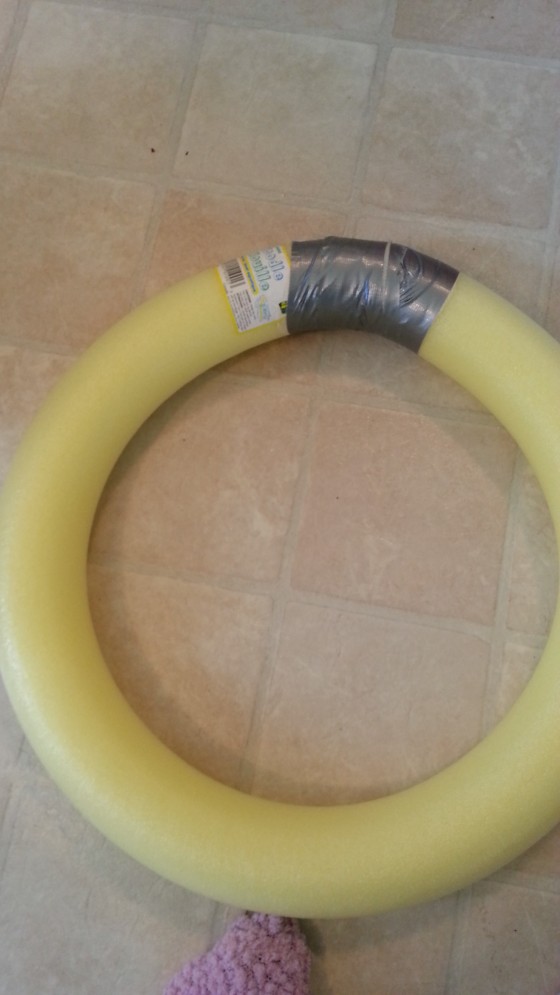
  •  A pool noodle ($1.50)

267

(Which I taped the ends together with duct tape)

  • Felt (an assortment of colours in one package for $1.00 a piece. I bought 3 packages)
  • Yarn. I bought three small bundles of different colours ($1.99 each) and one large bundle ($3.99)

yarn

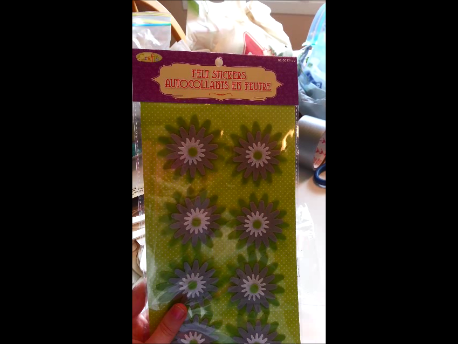
  • Felt flowers ($2.00)

flowers

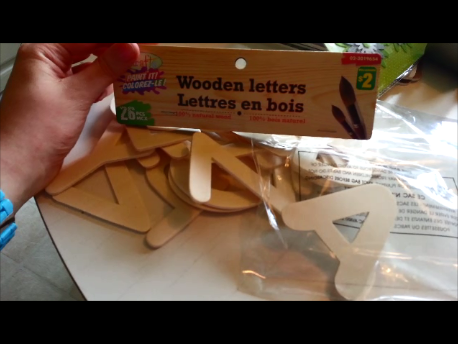
Wooden letters (although I only needed two specific letters, it was cheaper to buy the whole alphabet. Go figure. $2.00)

letters

  • Miscellaneous decorative little treasures. I bought some fake birds, ribbons, fake fruit (what was I thinking?), fake flowers, etc. (total: $6.00)

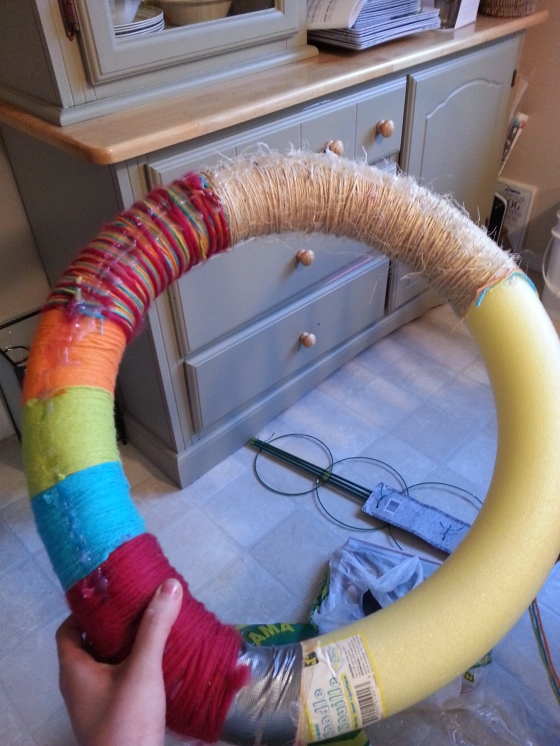
And then I got to work wrapping the yarn around the noodle. This took a pretty large amount of time, I won’t lie to you. I was visiting with my mom, so I spent most of the time gabbing. I recommend you do the same.. or watch tv. If so, I recommend True Blood. 🙂 Anyone else so excited for season 6?!

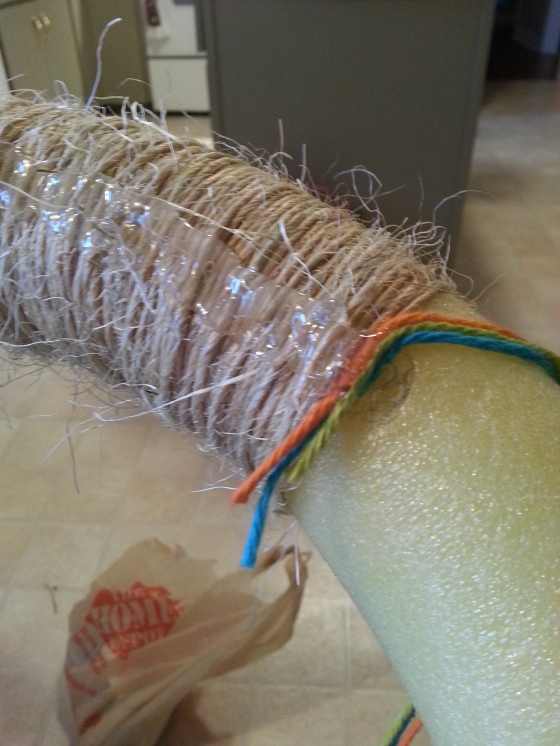
Here’s a shot of the back-side. Basically, I glued one end down, wrapped, and then stuck a line of hot glue across the back to secure it.

276

277

I used twine as well.

279

Not so pretty yet eh? I know… I was getting kind of frustrated at this point.

280

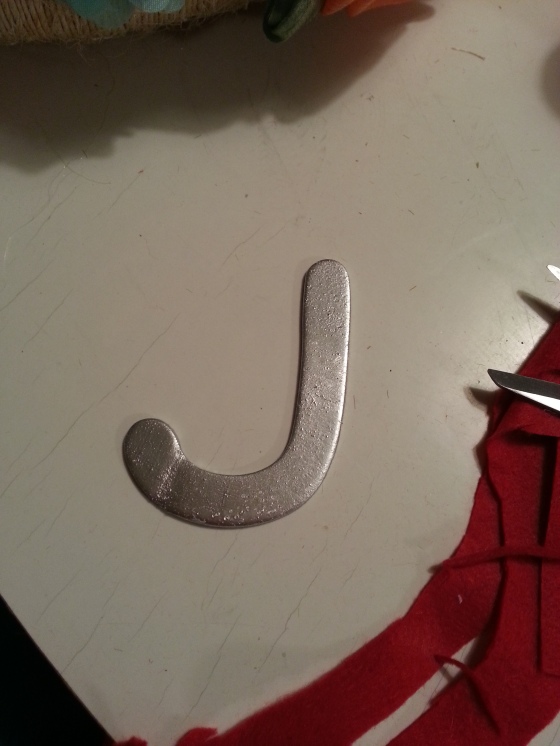
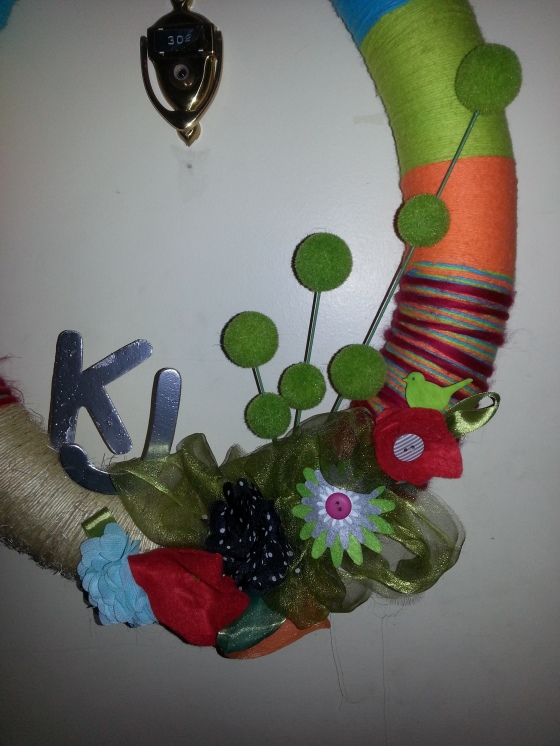
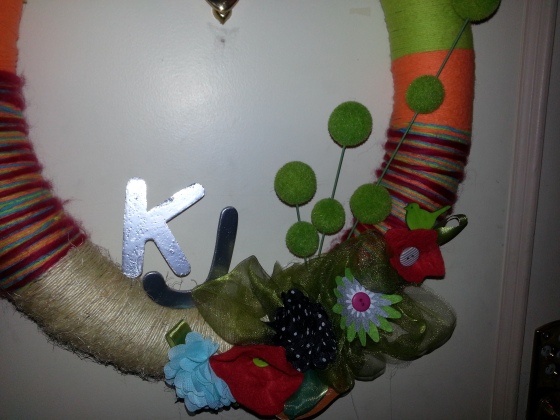
I spray painted a “J” and a “K” (for mine and my boyfriend’s initials) chrome. I wanted the wreath to have a personal, monogramed touch to it :).

283

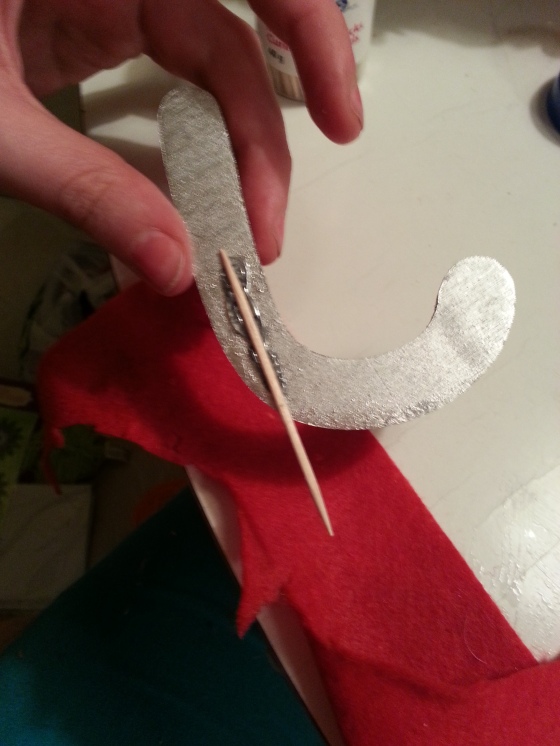
I glue gunned a toothpick on the back of the letters so that I could stick them into the noodle, and that they would stand upright.

And here’s where it gets hazy. I got so into decorating it, that I didn’t take too many pictures. Basically, I glued, glued, glued! And then glued some more. I also tried my hand at making my own flowers… I think it takes practice.

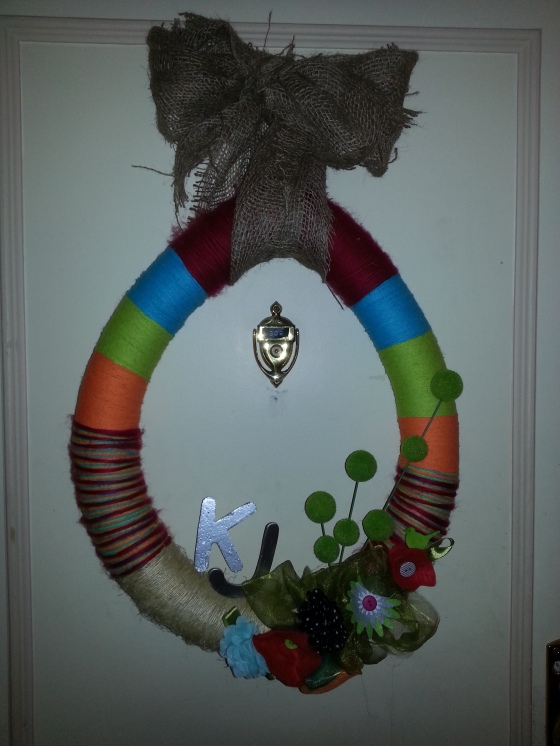
Here is the finished product:

288

290

291

Alright, alright, it’s not as great as the others but not bad for my first try! 🙂 I think the lighting kind of sucks. Anyway, I still love it. Even though it kind of turned out sort of easter egg shaped. My goal is to do a wreath for every season and holiday. I’ll keep you posted.

So which wreath was your favourite? Have you made any amazing wreaths lately? Do share. I salute you masters of felt.

Pssssst: I found a two great tutorials on how to make felt flowers. Please don’t burn yourselves on the hot glue! I know I did!

http://www.lifeafterlaundry.com/felt-flower-tutorial/

http://papernstitchblog.com/2011/12/14/diy-felt-flowers-five-ways/

Enjoy!

Red Sticks

Hello everyone!

Are you looking for a fun, bold, yet simple statement piece for your home? I’ve got just the thing! It’s easy to do, environmentally friendly, CHEAP I mean affordable ;), and well, just plain fun. Ok, I’m really selling it, but I honestly really loved the way it turned out.

When cruising blogs (as I do way, WAY too often), I stumbled upon these little gems:

redsticksinvase

I love the red sticks when placed in a clear vase… I think if vase were patterend or even opaque, it would take away from them.

redbranchesinwhitevase

Don’t these look smart in the simple white ceramic vase?

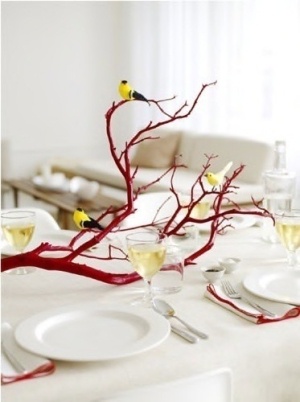
redbranchcentrepiece

Or even just one branch as a centrepiece on your table? Gorgeous!

branchonbookcase

Check out how this blogger used only one branch resting on a bookshelf. I love how the red pops against the blue walls.

branches in vase

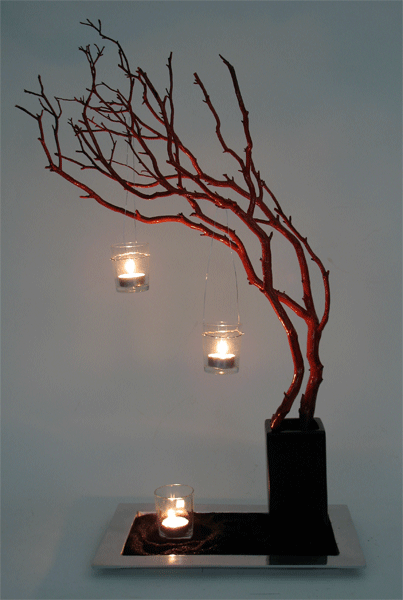
This is a neat adaptation to the idea… incorporating tealights. Hmmm… could work!

Anyway, needless to say, I was inspired. And this usually follows with me wondering how I can DIY it myself. So I found myself on a mission to hunt down some suitable twigs for painting.

The whole idea kind of left my mind, until one day I was walking my dog in the woods, and I stumbled upon some branches that the deer had chewed all of the bark off of. In other words, they had done all the dirty work for me. The branches were perfectly smooth, virtually bark free, and ready for spraying. Bonus!

609

132

Well, after scouring my computer for the before pictures of the actually branches before I painted them, I found nothin’. I’m sorry guys, it’s frustrating… but basically they looked something like this:

growing greener

Although mine had virtually no bark left on them. I contemplated leaving them natural, but the idea of painting them red could not be shook.

So I did.

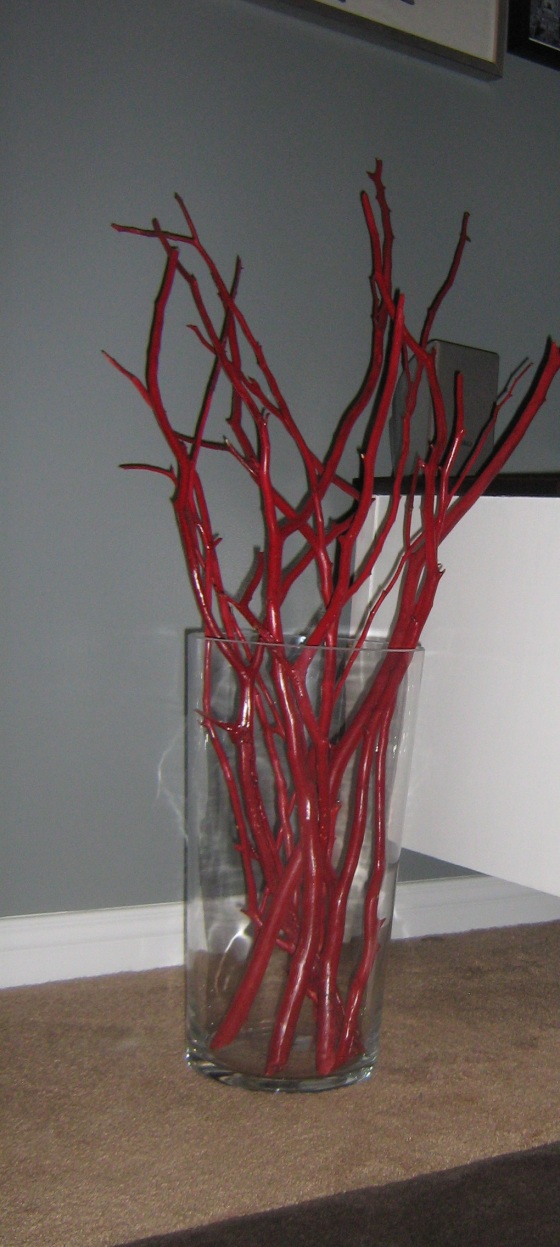
And now they live in an IKEA vase in our living room:

mine

I absolutely love how they turned out. We get compliments on them all of the time.

Here’s the project cost break-down:

  • $20.00 approximately for the IKEA vase
  • $5.99 for the spray paint (1 can did a pretty good job)

Total: $25.99

Mind you, it does go against everything I stand for buying the vase from IKEA… however, sometimes I find I get impatient while searching the thrift store for a specific item, and then end up just buying something new (rather than waiting for something to come around). I bet you could find one though for much cheaper ;).

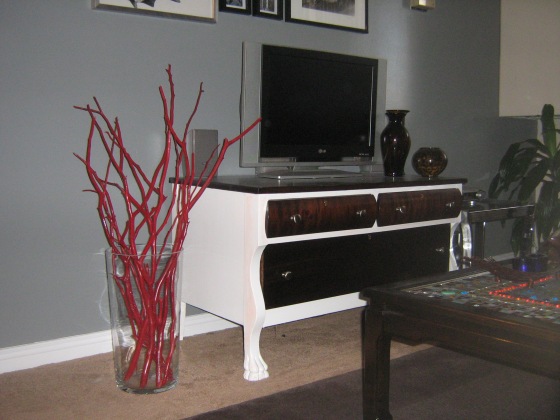
Here’s another shot:

029

Wouldn’t they look spectacular in an ultramarine blue? Or white? Or yellow? Or orange for Halloween? AH! Ok, every colour would look awesome haha. (One more..) Or forest green? 😀

Please disregard the stain peeking through on my tv unit. I have literally painted it 15 times, have used special “stain proof” primer, and have repainted it again with 5 more coats of white. Does anyone know anything that will stop the bleeding? Just keeping it real.

Anyway, I hope you try this project yourself. And if you do, please send me the pictures. Someone try it with sunshine yellow… I dare you. 🙂

Once again, thank you for reading and following along. I love you guys!

Balcony Bliss

I am so excited to share with you what I feel is the best part of our apartment. It’s the space that cost the least amount of money to furnish, had the worst before pictures, but the best overall impact.

Drum roll please…. brrrrrmmmmmmm…. Are you ready? Our balcony!

When looking for a place having a little bit of outdoor space was absolutely crucial in our hunt. However, when you’re looking downtown, this luxury isn’t always easily come by.

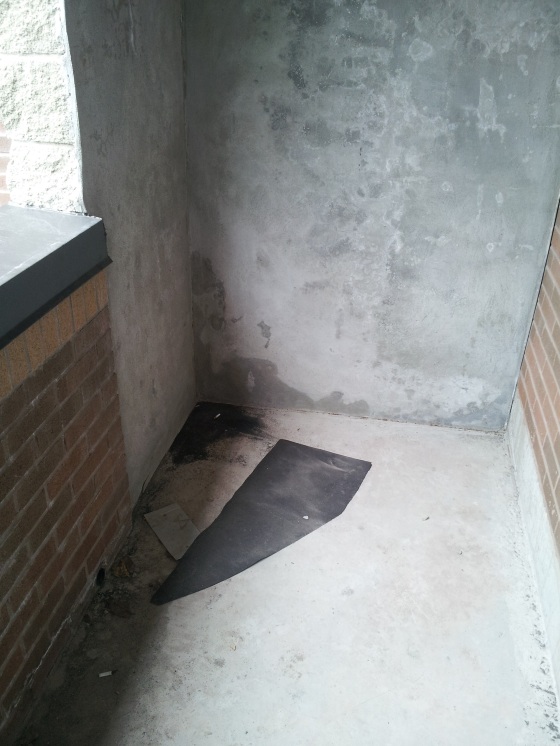
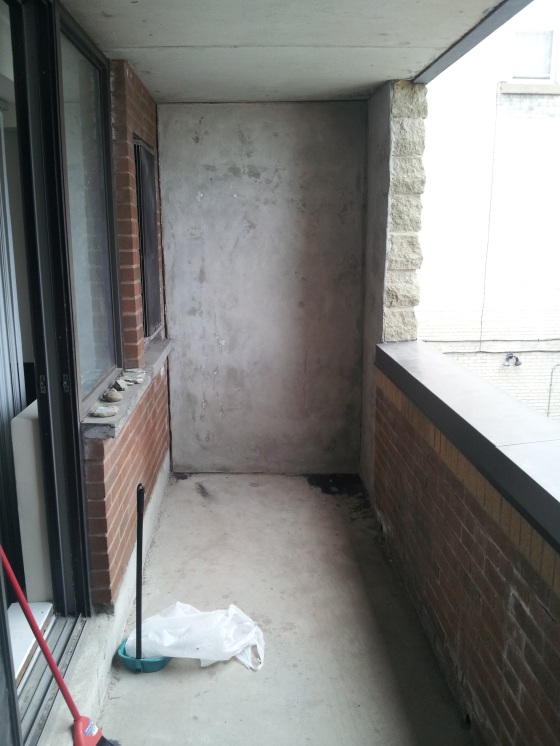
Here are the dreadful before shots:

1

3

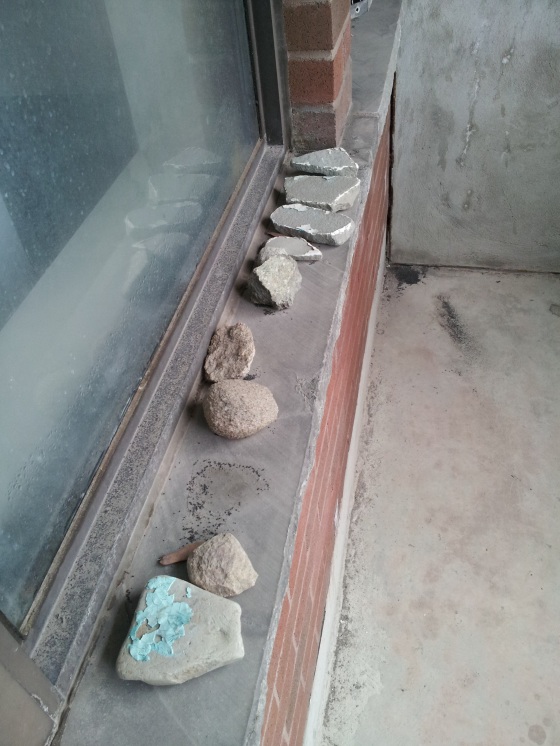
Believe it or not, these pictures were taken AFTER I did a load of sweeping. Oh, and I my thrifty natured self thought I would save a little dough and buy my broom and dust pan from the Dollar Store… big mistake. There are somethings that just need to be good quality. So after alot of sweeping (some cursing and swearing at my broom), and cleaning up everything from garbage, to leaves, to old kitty litter (oh ya, the past tenant must have had an animal pooping on the balcony. LOVELY), it was ready to start decorating! Yayyy, the fun part! But before I show you the afters, I’ll share this little treasure with you:

2

Ya… I think they had some sort of dumpy rock collection. ?…? what… the…? 🙂

Ok, enough trash talkin’. Each to their own.

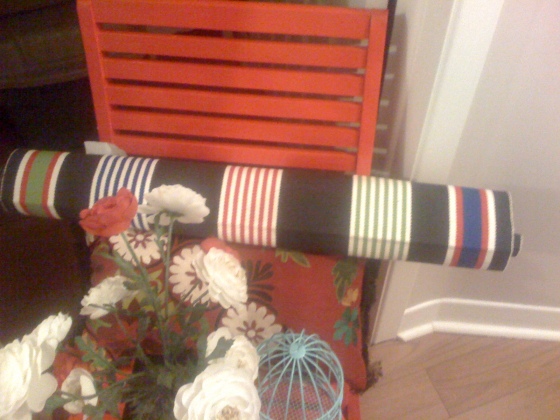
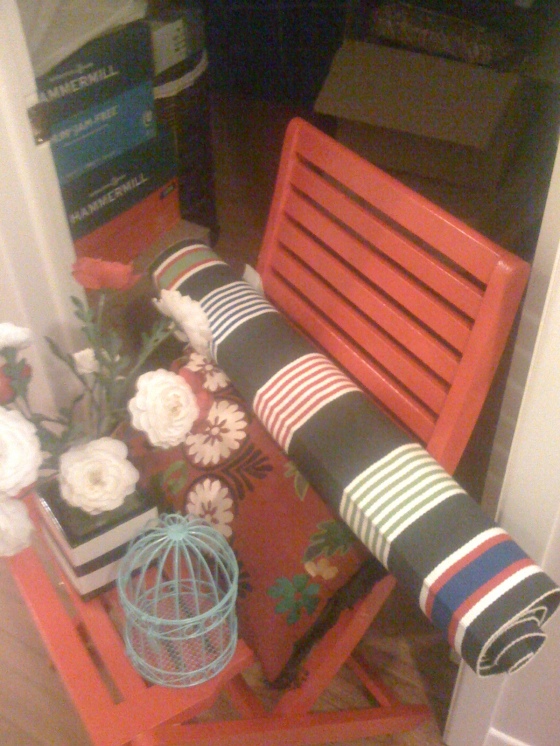
Here’s what I started with. I first saw the apartment and then bought everything and gathered what I needed in my parents garage/spare bedroom.

014

013

Sorry for the crappy picture quality — getting a new camera is on my “to buy list”. Those pictures were taken from my ancient iphone.
So basically, I gathered a bunch of items that I wanted to be the basis for the colour scheme. My thought process was essentially that I wanted a place for people to sit and chat or possibly eat, and another place for someone to relax and maybe read. It was also important for me to have kind of a pier1 imports meets bright bold colours sort of vibe. Fun, fresh, and summery. OOoooo 🙂

Also, although I had a pier1 imports eye, I’m working with my usual thrifty budget. Challenge accepted!

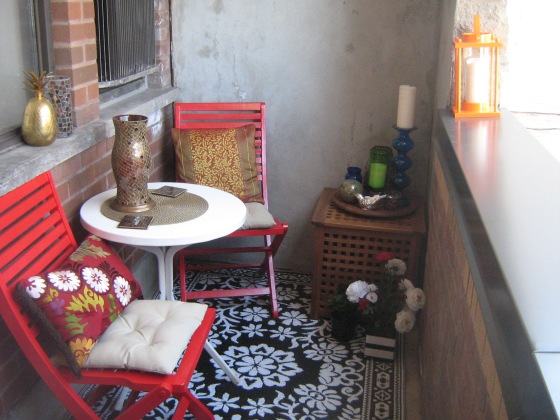
Here are the after pictures. Voila:

063

067

So allow me to break it down for ya. I’ll walk you through the projects that I did within this space.

074

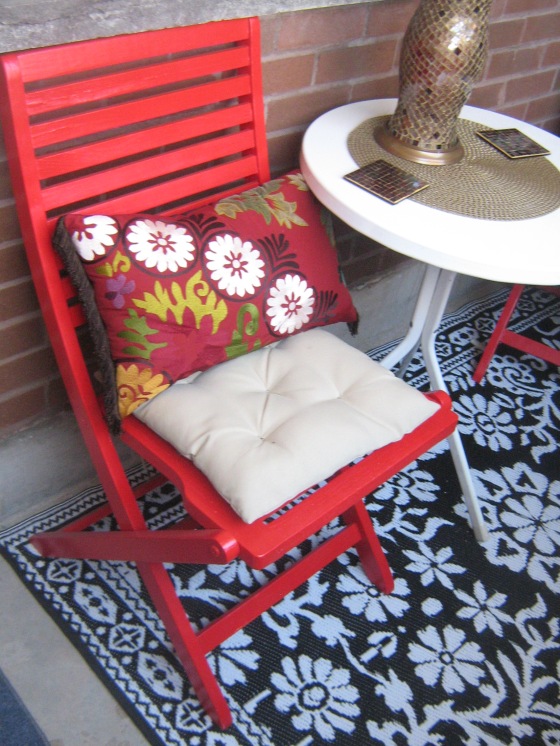
The red chairs were purchased from Value Village for $3.00 each. I took me about 3 cans to spray paint them red. Very simple project. The black and white floral rug was from Giant Tiger for $14.99, and the white table was found in my neighbours trash (score!). The beige pillows on the chairs were from the Dollar Store, and the floral patterned larger pillows were from the Salvation Army for $2.99 (might I add that the one above had a pier1 imports tag on it!).

005after

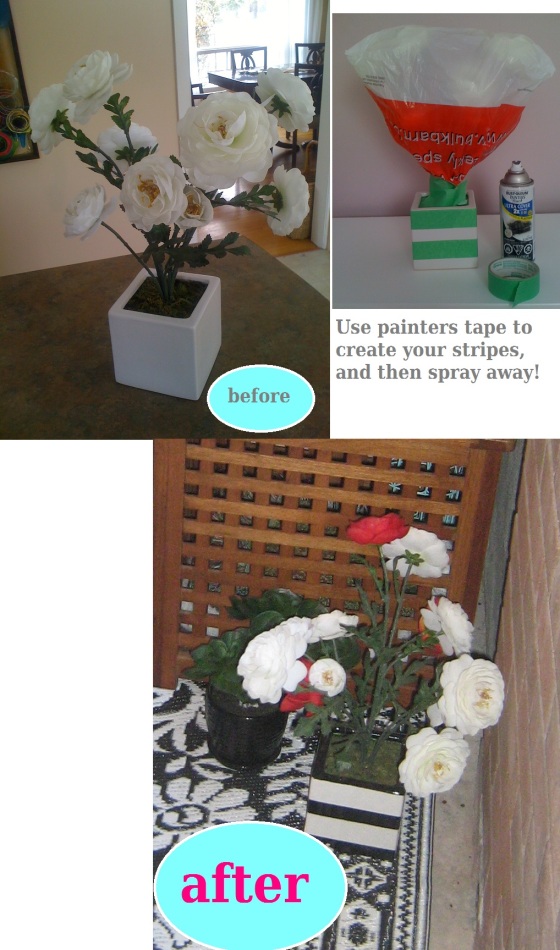
That little flower cost about $1.99 from Salvation army, and I used left over spray paint to paint the stripes. I also added in some red flower heads to play off the red chairs. I like it because it is fake and I kill most plants I come into contact with.

069

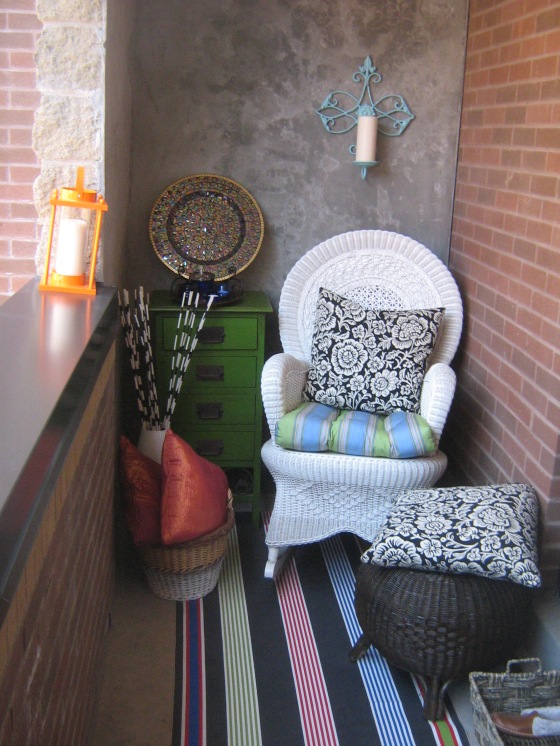
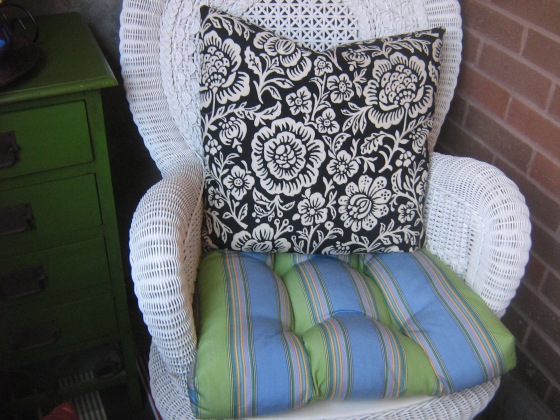
This white rocking chair was found in my neighbours trash (I have pretty generous neighbours eh?). The black and white floral pillows were a steal at $4.99 each from Salvation army. The striped cushion was a little bit of a splurge at $25.99 from Homesense, but it was the only cushion that was sold as a single.

071

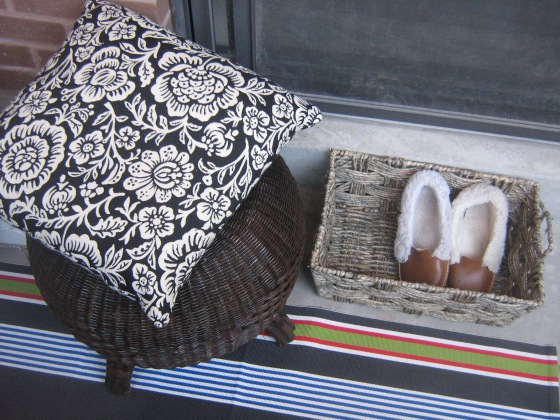
The wicker ottoman was found in my neighbours trash. I don’t have the before pictures, but it was pretty dirty and not the nicest finish, so I washed it all down, rubbed some ebonny miniwax that I had kickin’ around, and gave it a coat of varathane (also something that I usually have instock). The beautiful bright striped rug was a gift from my mother as a move-in present (I believe she got it from IKEA). The basket where I keep my slippers (and now kitten toys 🙂 ) was $3.99 from Salvation army.

072

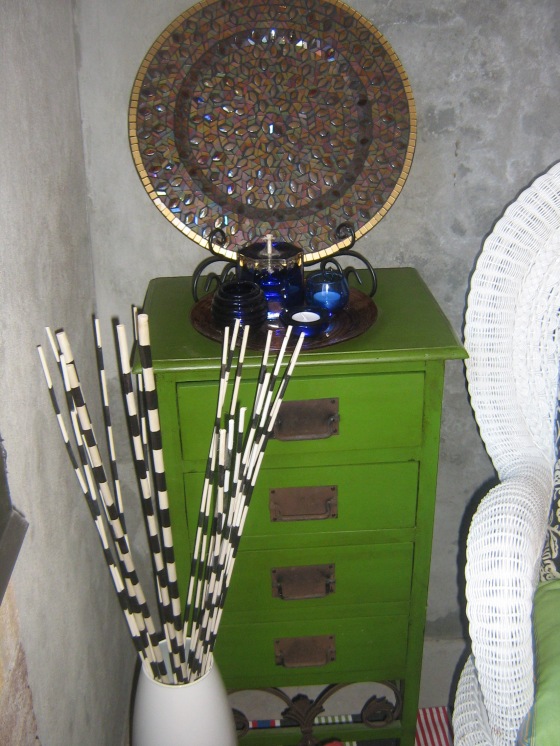
The black and white sticks were purchased from IKEA for 10 bucks I believe. The green skinny dresser was from a garage sale for $30. And the accessories were from the thrift store for extremely cheap as well.

073

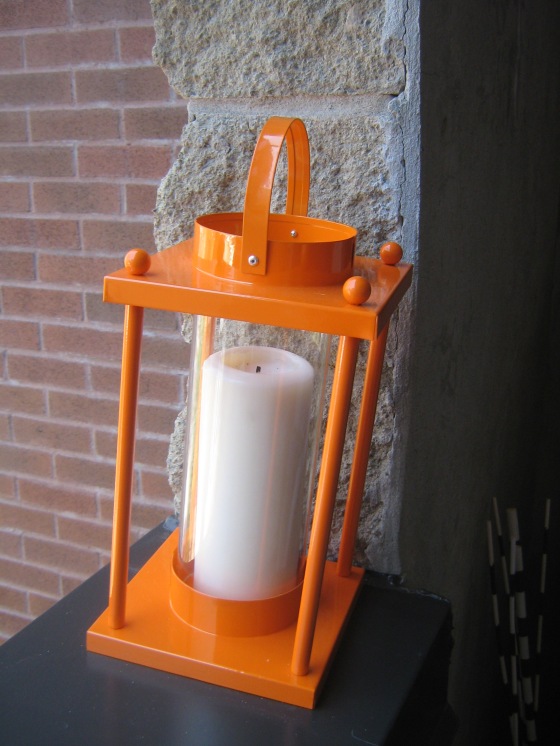
I looooooove these candle holders from Homesense. They were $15.99 each (which is a little bit of a splurge for me, but hey, I absolutely love them). I bought matching ones for either end.

Let’s do a final break down of how much money I spent on the space in its entirety:

  • Red chairs: $3.99 each + 3 cans of spray paint ($4.99 each) = $23.00
  • Pillows: approximately $40.00 for the whole gang
  • Rugs: $14.99
  • Accessories: approximately $50.00
  • Candles: $15.00

Grand total: approximately $143.00

I would still really love to get a big wall art for the wall behind the red chairs. You know those vintage ones with big ornate iron designs? Maybe something with birds? I’m on the look-out. I’ve checked Homesense without any luck. If you find some pretty ones please let me know where.

Sometime soon I will post pictures of it all lit up at night with candles. It’s absolutely gorgeous this time of year. If I could, I would invite you all over for margaritas :). Ooo or Sangria. Have you done anything fun outside for spring? Are you loving all the spring and summer stuff coming into the stores as much as I am?  Homesense had some amazingly beautiful outdoor cushions. Thanks for reading!


Ohhh the possibilities!

I wanted to post today on the ever elusive “ones that got away”. Boo hoo. I don’t know if anyone else does this, but I often find myself taking pictures (usually with my phone) of objects of interest that I may just not have the space to transform myself. For example, anyone who knows me well knows that I have a fetish  love for vintage lamps that most people would pass-by. But really, how many lamps can one person own? I’m pretty much maxed out. So when I see ones with potential, I take a picture and then hopefully blog about it. Same goes for a whole array of other random stuff. Although these treasures were not purchased by myself (sometimes you just have to walk away haha), I hope they found happy homes.

I often talk with people about the idea of thrift shopping (which to some people is actually a very unsettling thing to do). They have concerns like “well, I wouldn’t know what to do with things” or “when I go, I only find junk” or “there’s so much there, I often get totally overwhelmed”. These concerns are totally valid. Have no fear. Just have fun with it, keep an open mind, and don’t buy the underwear :). This light ceramics, most fabrics, lamps, books, etc. are totally safe and pose little threat from the past owners possible germs. And hey, why pay full price for something that “everybody’s got” when you could find something completely unique for a fraction of the cost.

So here goes, let’s talk about potential. Keep an open mind… and hold onto your seats… it’s going to get crazy up in here.

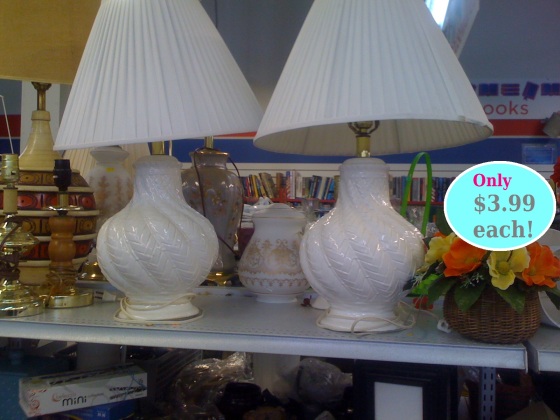
134p

These two lamps are awesome — they’re in working condition, and they have an awesome shape and texture. I actually like the white, but if it’s not your bag (baby) you could always spray paint them a fun, bright colour. I think they’d look cute in a bright and sunny yellow. Once you put a new shade on them (maybe a modern white drum shade), they’d look good as new. I personally think they’d look awesome on either end of a couch.. or maybe bedside tables in a guest bedroom. Best part is, they’re only $3.99!! You can’t go wrong!

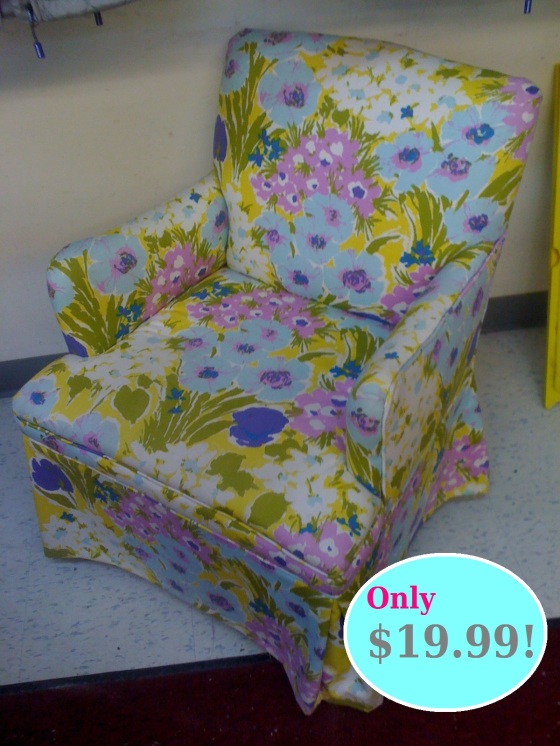
007p

You have no idea how much it PAINED me to pass-up this crazy bargain. Holy moly. I know what you may be thinking… “It’s used. Someone elses tush has been on it.” But once you get passed that mental block, it really isn’t that bad. It didn’t smell or anything, it had no stains or rips, and that fabric is absolutely gorgeous! I love how vintage and bright it is. Wouldn’t it look outstanding in a bedroom? Maybe put a turquoise pillow on it. You could plan out the entire colour scheme of your bedroom on just this chair — you could find pillows in blues, purples, yellows, and greens… maybe a white bedspread… a pretty floral throw… Honestly, it was such a find, and I hope someone is so happy with it. I came back the next day and it was gone (of course).

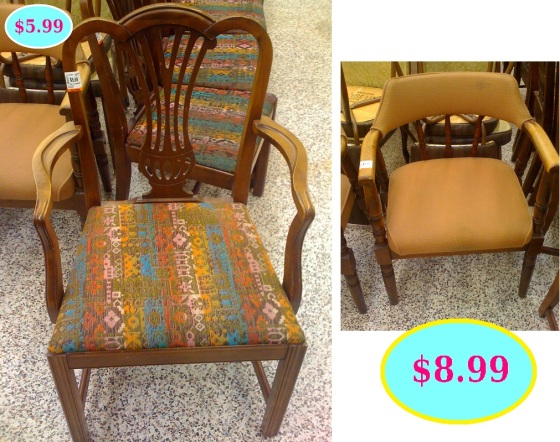
061p

So everyone has seen the large amount of wooden chairs with fabric cushion at the salvation army. If the fabric is not your cup of tea, change it. It is so simple, so inexpensive, and can give your space a custom look. Many times there will even be full sets (for your dining room). The best part about these chairs is that they are super inexpensive so you can really take chances and make mistakes (anyone catch that magic school bus reference?) I could see these chairs spray painted in fun colours with new modern fabrics. This is a very fun and quick project that you will find at most any thrift store. They’re a dime a dozen.

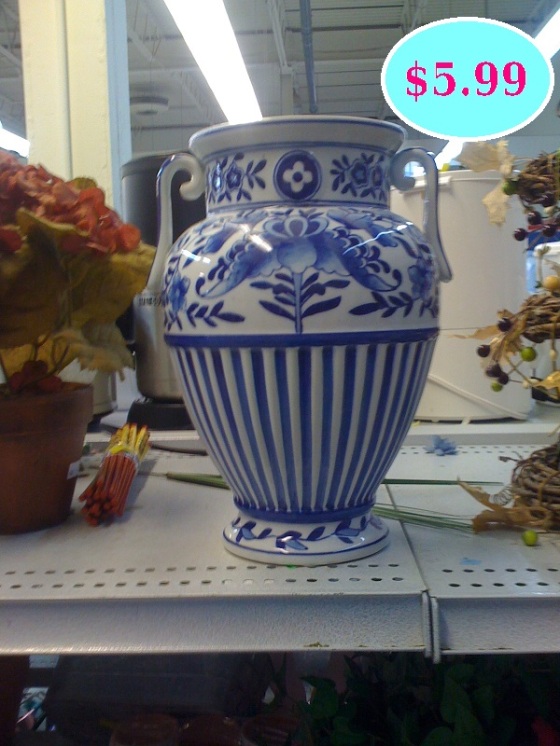
068p

Many times I have gone thrifting and have seen vases with this same colour scheme. I love it. I think it would look absolutely gorgeous with an orchid sitting in side, or possibly some other plant. The blue and white motif is classic, and I bet this vase originally cost alot more than 6 bucks. Great deal.

thriftfabrics

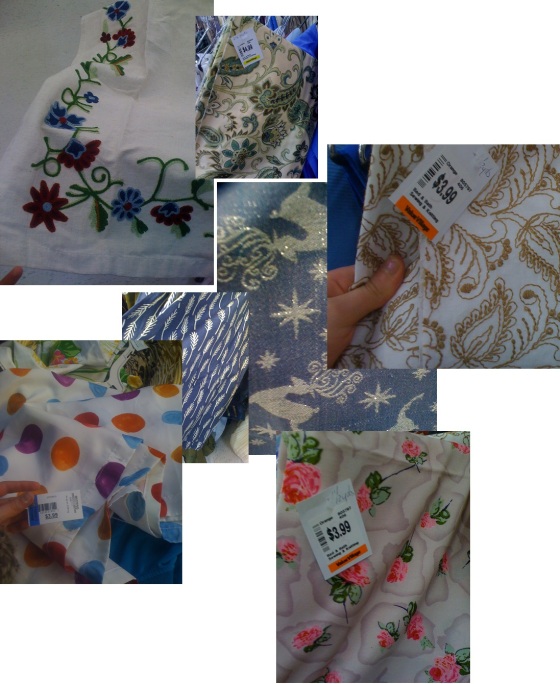
Fabrics, fabrics, fabrics! There are so many to chose from, and the possibilities of what you can make with them are endless. I love that you can find the awesome vintage flavours at thrift shops. Many of the times there are 3 or 4 yards for $3.99. You really can’t beat that. I think the polka dots would be cute drapes for a kids room… or maybe a shower curtain for a kids bathroom. You could make pillow shams out of the pink rose material. I’ve seen bloggers do pretty amazing lamp shade redos with embroidered material like the top one (how very anthropology). And imagine some of the more canvas-like material made into napkins or placemats. Very cute. Just throw it in the wash and get sewing :).

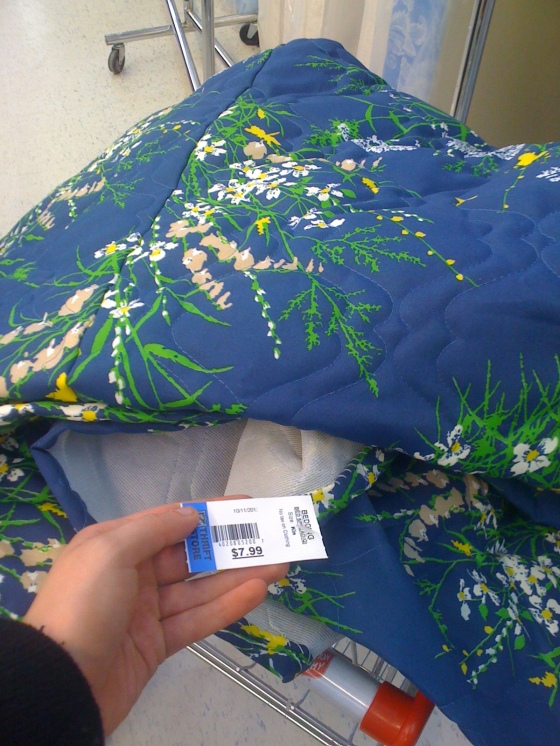
Here are two that I absolutely loved:

338

I’m a sucker for daisies. And royal blue. And bright colours in general :). I would have loved to make a pair of pillows out of that sucker…

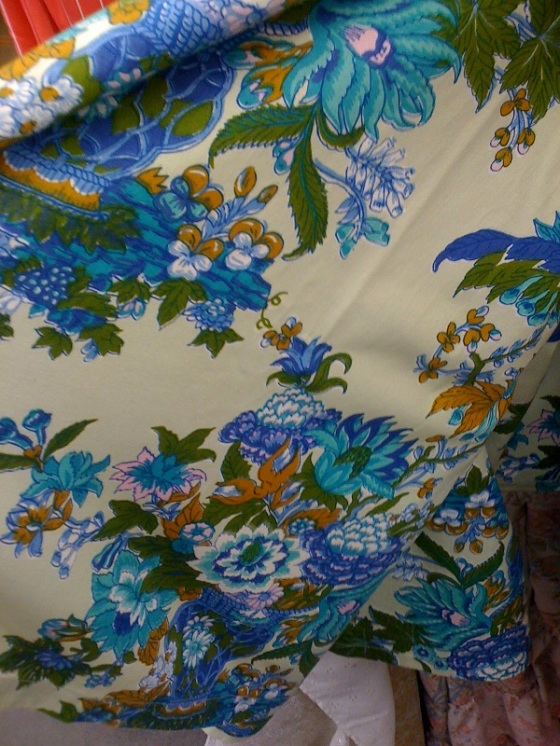
270

Hummina, hummina, hummina. I love this vintage fabric. There was so much of it too. I don’t know exactly what I would have done with it, but I think it’s amazing. If you have any ideas, please share.

Well, that’s all for now folks. I hope some of these ideas have inspired you to hit-up your local thrift shop. Man, it still hurts to have given up that floral chair. Oh well, there will be others ;). Happy thrifting! TGIF!

Thrifted Sculpture

I wanted to share with you a quick redo that I did over the summer that is a perfect example of seeing potential in thrifted treasures. Many of my best scores from thrift stores have been fixer-up-‘ers, or weren’t perfectly styled from the get-go. Sometimes you have to keep your eyes and mind open to the possibilities. I always say, a little spray paint can go a long way.

In this particular case, that is exactly what I did. I’m an art graduate and am naturally drawn to unusal, artsy objects (if that makes any sense). And I love the simplicity of sculptural white objects. There are many (and I mean MANY) examples of objects that have been white-washed throughout our apartment, but this little guy is one of my favorites.

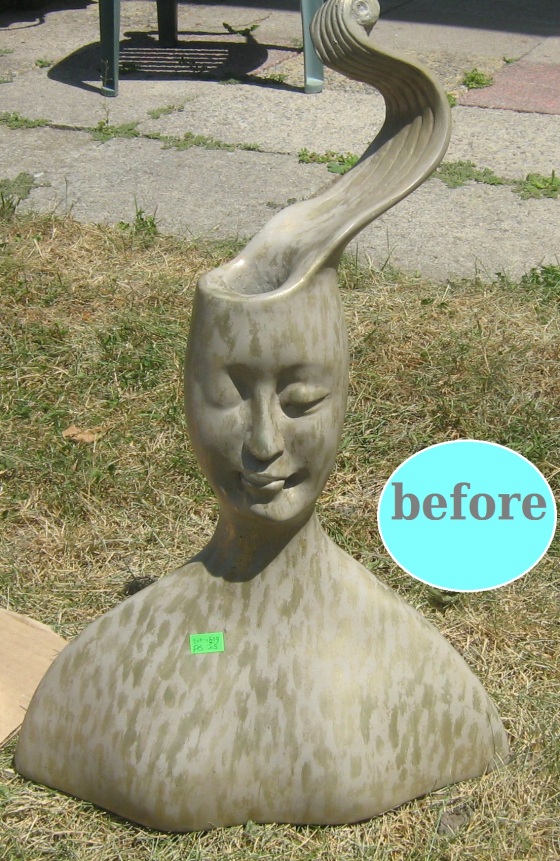
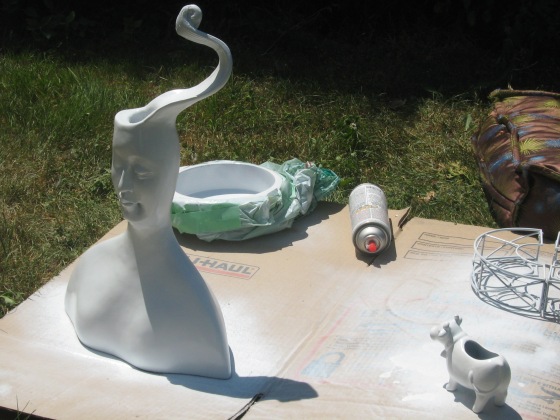
Here he is “before make-over shot” in all his icky grey, spunge painted glory:

07711b

**Please note the $6.99 price tag. It had “AS IS” written on it as well, but he wasn’t chipped or anything. If you can see as well, I believe at some point he may have been used as a vase? When I bought him off the rack there was a giant, fake flower stuck inside.

So basically when I got him home, I was so excited that I dragged him outside to the backyard and immediately spray painted him a glossy white. You know sometimes how you can just visualize something, and you just have to execute it?

079

When I spray paint, I try to do it in bulk. You can see some other little projects kicking around in there as well.

I know what you’re probably thinking….

hold up

WHAT KIND OF SPRAY PAINT DID YOU USE?!

For anyone who is interested, I used Krylon Gloss White Spray Paint. I find it works the best and gives a really even finish. I did about 3 coats on him as well. Two probably would have been fine.

krylon1

It runs about $4.99 at Canadian Tire. I buy this stuff like it’s the zombie apocalypse and the only way to kill the zombies is to spray paint them white. 🙂 Honestly, it’s ridiculous how much money I spend on spray paint… I probably keep Krylon in business.

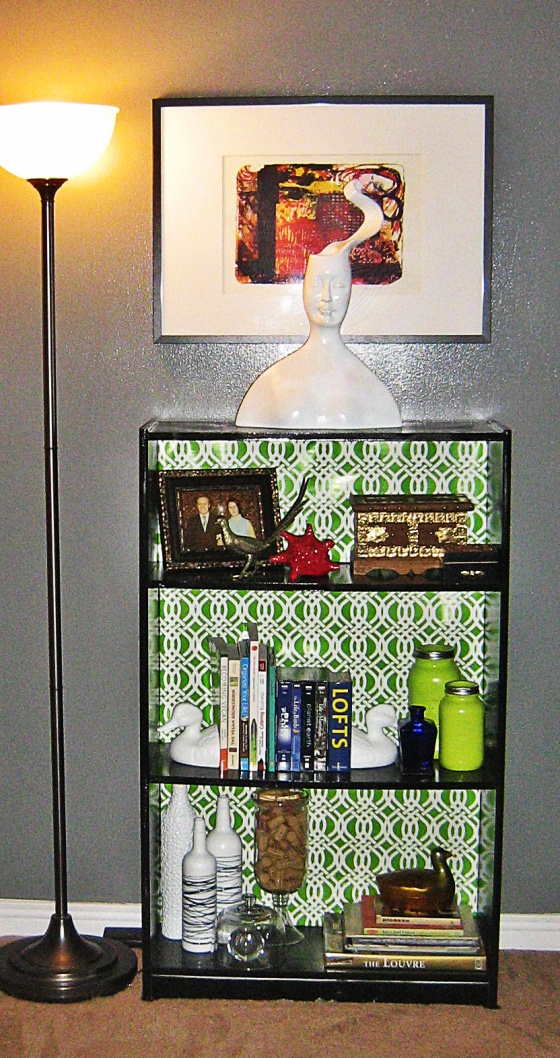
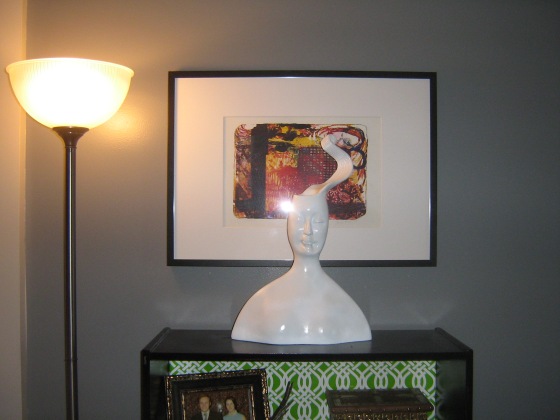
Anyway, back to the reveal. Now he lives on top of a bookcase that I redid recently (I’ll post on that soon enough).

hagrid

027

Have you revived any junkie items into swanky, modern new treasures? Or have you spray painted anything exciting lately? Is it crazy that I find spray painting things exciting…? If it is, I don’t want to be sane! 🙂

Yakkity Yack, baby Jack!

On a completely unrelated subject, I would like to share with you how adorable my new kitten is. Holy-freaking-cuteness batman. He is absolutely the most precious thing ever.

jack1

His name is Jack… get it? Black Jack? However, I’m currently calling him baby Jack. For those of you who maybe wondering, we were told he is part persian and possibly part himalayan. If anyone out there is a cat expert and can tell me differently, I would love to know.

I spent a couple of hours the other day trying to take adorable baby pictures of him without much luck. I gathered a ton of props like cute teapots for him to sit in… vases with flowers… pretty pillows to sit him on… and he wasn’t having any of it. I may try again on another occassion though.

Here’s another cute one I snagged before he ran off (probably to chase a piece of string).

cotton

Awwwwwwwwwwww. I’m sorry, I had to! I’ll be back to talking about inexpensive decor tomorrow! Have no fear :).

Here’s one more for good measure:

cuteness1

Awww.

Planning out our Master Bedroom

I am so excited to share our master bedroom redo with you. I can’t even tell you how long I’ve spent planning it out, scoping out pinterest, reading house and home magazines, cruising Pier 1 imports, Homesense, the thrift stores (of course!) searching for pieces and trying to get the exact look. I wanted to incorporate bright, fun colours, but also have it be relaxing and clean. And if you’re like me, you’re on that beer budget with champagne taste. I like to look at it as a fun challenge rather than a negative :).

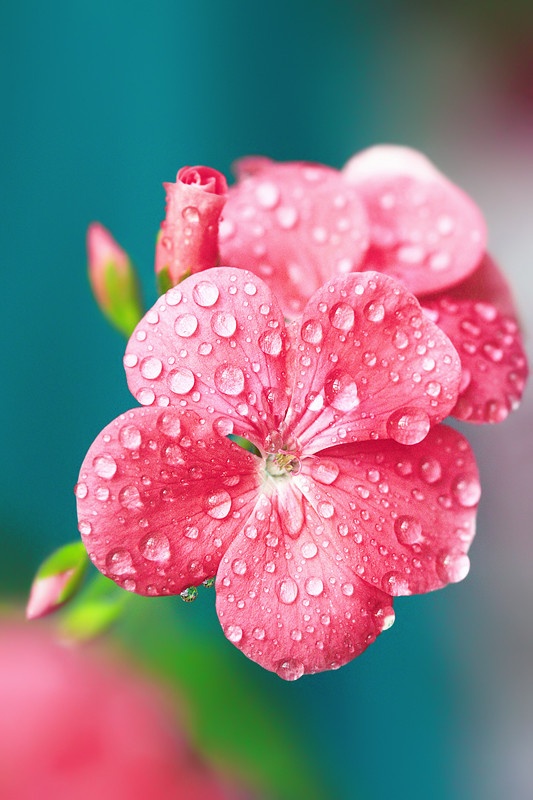
I started by envisioning a colour scheme. I absolutely love the colour turquoise — I think it looks crisp against whites and has that cheery modern feel. When searching around on the internet, I found this picture and it really inspired me to use it as a jumping off point when choosing colours.

inspiration from nature

What drew me to this image initially was the bright turquoise against the different shades of pink in the flower. But as I looked closer, I really loved the peak-a-boos of lime green, grey, and white. When I had chosen a definitive colour scheme, I then started accumulating inspirational photos on pinterest, commercial webpages, and some of my fav blogs.

Here are some of the gems that got my brain buzzing:

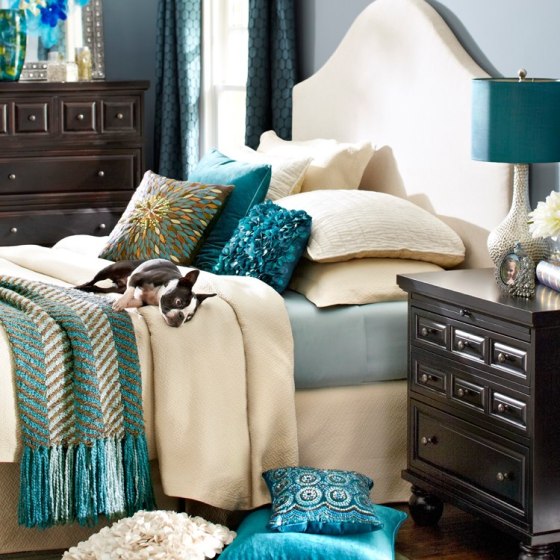
elements of my bedroom

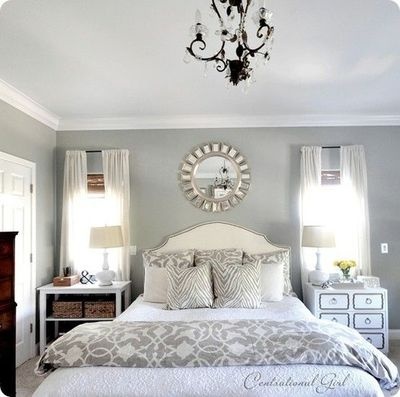
light-turquoise-green-bedroom

pier 1 bedroom

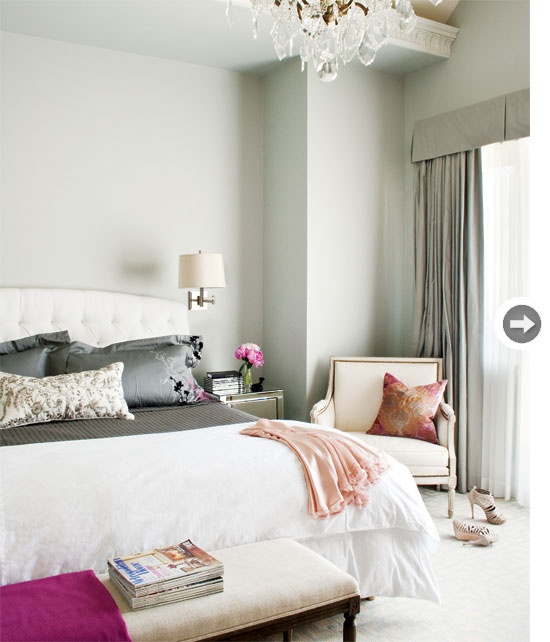
grey and soft pink

gb6 white bed

Out of all of the eye-candy images that I have accumulated, I chose these to show you because I feel they capture many of the elements that I really wanted to achieve:

  • Bright white areas: Whether it be furniture painted white, objects, accessories, etc. I wanted those crisp whites so that the eye can rest against the more wild colours that I wanted to use as accents.
  • The use of grey: I loooove when grey is used in bedroom. In my opinion, it is tranquile, modern, neutral (but not boring) and can be paired with most accent colours.
  • Flowers: I really love the feminine touches that flowers can bring to a space. Don’t get me wrong, not everyone can afford to have their homes laced with fresh flowers on a regular basis — and if you’re like me, you kill any flowers within a mile radius! I have good intentions, but also a serious lack of green thumb. Plus, they make such amazingly authentic look fake flowers, and they can be quite affordable.
  • Tons of pillows: I am a self-confessed pillow obsessive collector enthusiast. I love the feeling of climbing into a comfy, luscious bed that is overflowing with comfy pillows. Pillows, might I add, are a great way to be fearless with pattern, texture and colour. If you find your bedding is looking a little on the blah side, by some funky decorative cushions to spice it up. For a very little financial commitment, you get a huge impact.
  • Neutral bedding: Although right now I am totally digging the colours I’ve chosen, but I may not in several years. So I wanted to choose a neutral bedding that can stand the test of time, and could possibly be moved to a guest bedroom if I grew tired of it. I know what you may be thinking, neutral blah bedding? That’s so boring! If you jazz it up with some fun pillows and patterned sheets, maybe even some throws, you won’t even notice. Plus, you don’t want every element of your room to be screaming at you. Then it becomes like a heavy metal concert. 🙂 Gotta have some softer harmonies. Unless you’re into metal… than rock on.
  • Personal touches: I wanted our master to have sentimental little touches throughout the space. Its nice looking around the room and remembering good times, cute pets you once had, and family members who you don’t get to see on a regular basis (I miss you Mom!)
  • Mirrored furniture: Nothing says luxury like mirrored furniture. But wait, I don’t have a ton of money to spend on expensive furniture… OH NO! Oh but wait, that has never stopped us before has it my thrifty friends? I’ll tell you how I was able to get some at a HUGE discount in a later post!

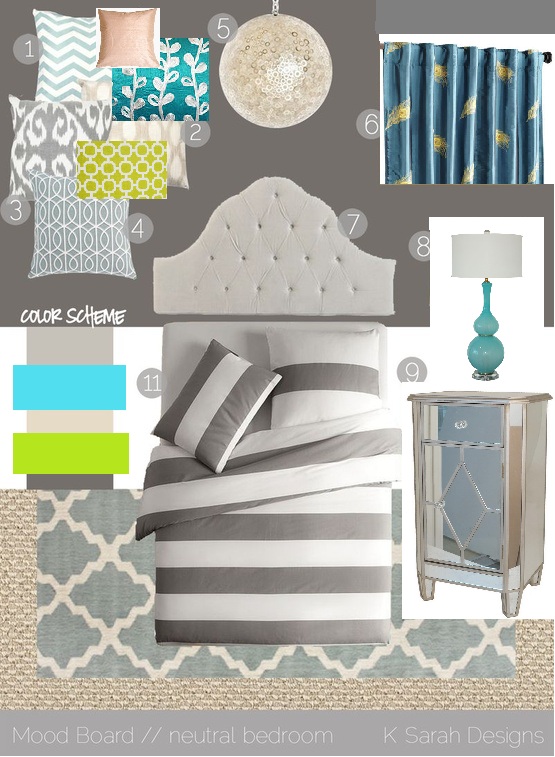
I also tried making my own mood board. To most people this may seem like a daunting task, but really, if you have “Paint” installed on your computer (which I believe most everyone does at this point), you can copy and paste images to make your very own. Or… you could find a similar one to what you want, and then copy and paste over it (like I did). I find it really helps to visualize things all together as a whole. I found this awesome one online from Sarah K. Designs, and then copy and pasted elements that I liked onto it:

mood board - for blog

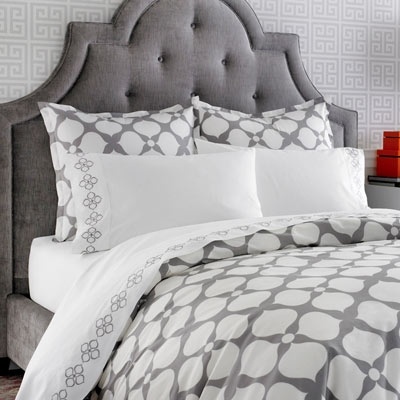
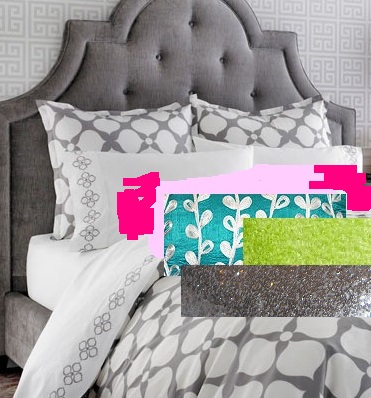
Another technique that I often use when trying to sort out design elements is finding an image that I like and then copy and pasting the colours and textures that I’m hoping to use directly into the image. For example, say you’re looking at buying a neutral bedding and you’re trying to organize which colours of pillows to use. Rather than going out and buying all your pillows and trying to sort out which work at home, you could simply copy and paste.

Here’s a photo of neutral bedding that I found on pinterest:

grey on grey on grey

And here’s the final image after I played around with copying and pasting the colours and patterns that I love:

MY BED AND MY PILLOWS1

It doesn’t have to be perfect. Even simply markering in colours (like I did with the hot pink) will be enough to give you the idea.

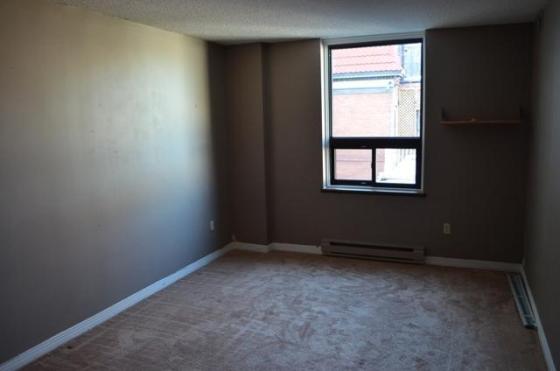
So finally here’s the goods. I’d love to show you my before and after pictures. I only have the initial pictures that I took when I first saw the apartment, but it more or less looked the same when we moved in. The landlord did update the room with a fresh coat of light grey, and they also cleaned the carpets. Nonetheless, here is the before pic:

4

I thought it had potential :). We got rid of the ugly old blind and random tv shelf. Although the room was already grey, it was dinged up alot, so they painted it a lighter, fresher grey, which I ended up loving.

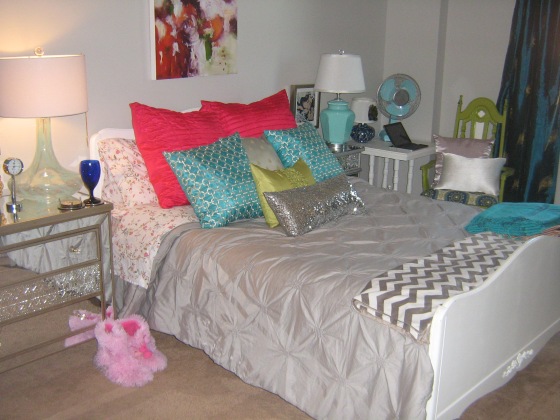
And without further ado, heeeere is the final product:

There are a ton of redos and projects in this picture that I will post on soon enough. I must make mention, the artwork above our bed was a gift from my dear artist friend Jan Fougere. Jan and I were studio buddies throughout our undergrad. Shout out to my fellow BFA grads!

080

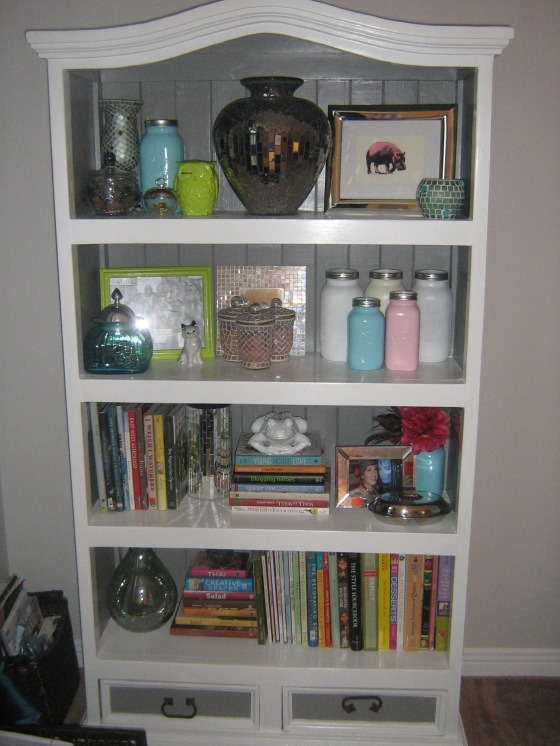
To the right of the window is this shelf that I redid. It holds all my decorating and vegan books. One day I’ll get around to trying all of the recipes in them…

103

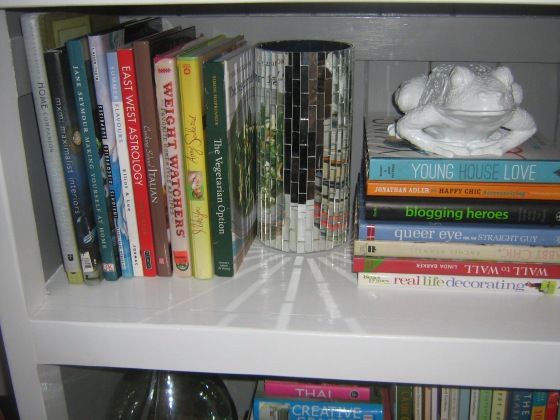
Here’s a detail shot. Big points for those who can spot the Young House Love book. Holllaaaaaaa.

109

093

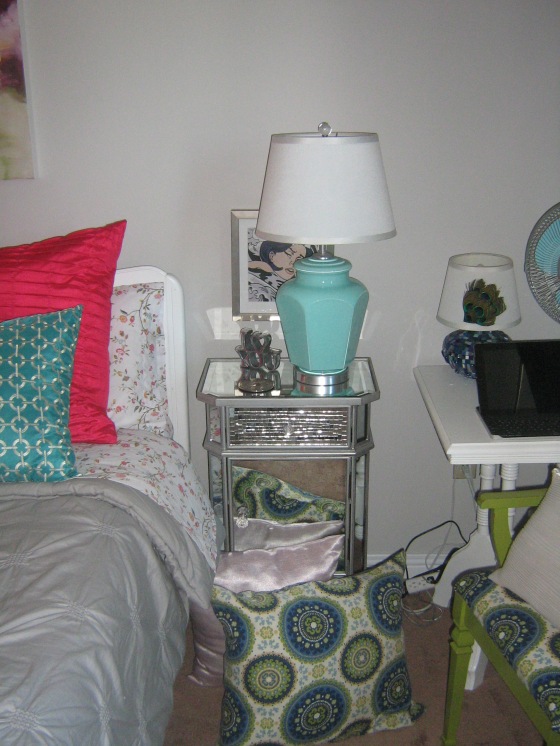
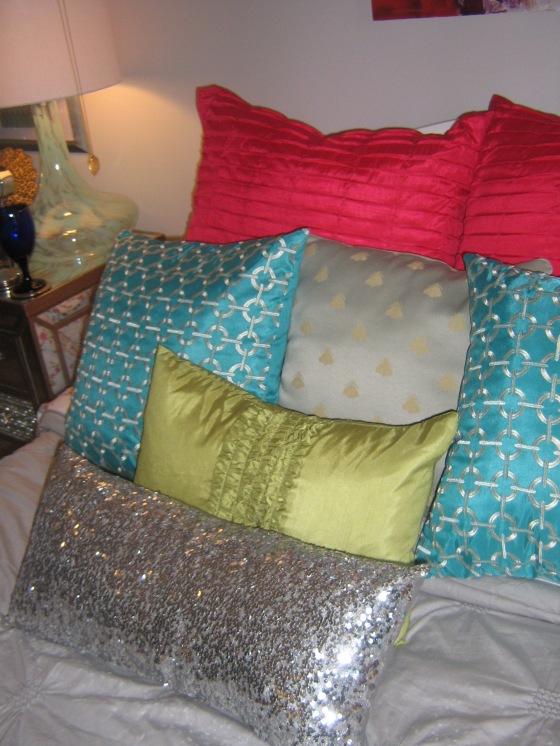
Here’s some pillow porn for those who love pillows as much as me. Mmmm… pillows :). The hot pink ones were a total splurge from Homesense, but I absolutely love them.

096

097

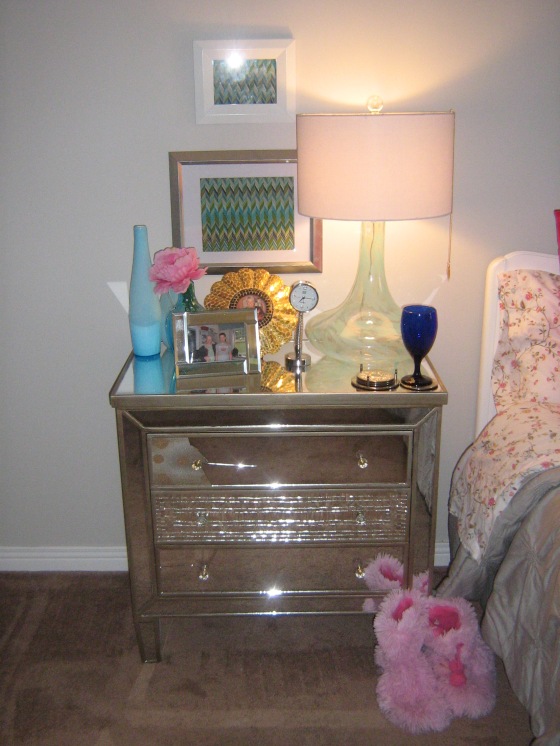
This is my bedside table that I redid myself. I’ll do a post with the specific how-to’s. It unfortunately got damaged in the move, but we plan to get it fixed.

082

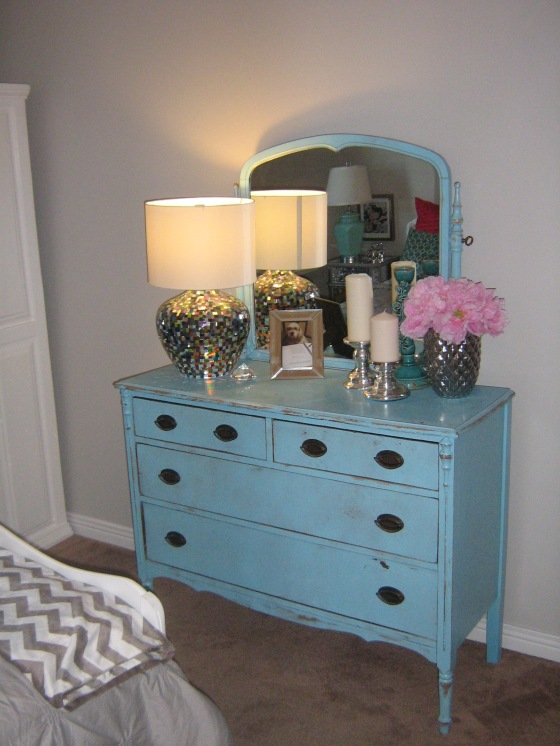
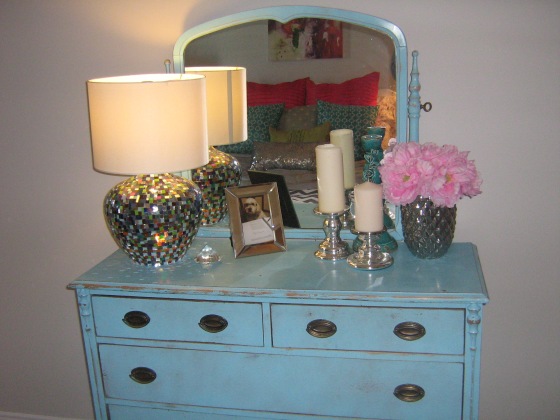
The lamp and dresser in this picture were redone by myself as well. The knick-knacks were from the thrift shop and dollaramma.

089

088

I plan to post a video of my bedroom tour very soon. I did one earlier in the month but it turned out being over 15 minutes long and youtube wasn’t having any of it! I will attempt one later this week. Also, I am slooowly updating the “Apartment Tour” area on my blog. I’m trying to get better quality images, but for now I’m going to continue using my crappy old camera.

I would like to leave you with the following advice that I found really helpful and inspiring. Don’t be afraid to cruise your local thrift shop. Resist the urge to pay full price. You may have to sort threw a ton of junk, but with an open mind and a little creativity there is no end to what you can accomplish. It really is amazing the great treasures you can find at quite a discount. I personally find it really helpful to browse your “dream stores”, get a feel for the look and quality that you want to achieve in your bedroom, and then stop by the Sally-Anne or Value Village. You may just find something similar to what you were just drooling over.

If you have any bedroom redos that you’d like to share or perhaps have a question regarding something you’ve seen in my bedroom please drop me a line. I love a good bedroom make-over! Thank you for reading.

New Apartment

Well the race is on! Our landlord contacted us and said it was fine if we moved in a touch early to our new place in order to avoid the holiday weekend busy-ness. So that brings our count down to 5 more days! 5. more. days. That is crazy. There are still a few projects that I need to finish before move in, and one of them is a doozy. Fortunately I have some time off of work to finish up some of these last minute projects.

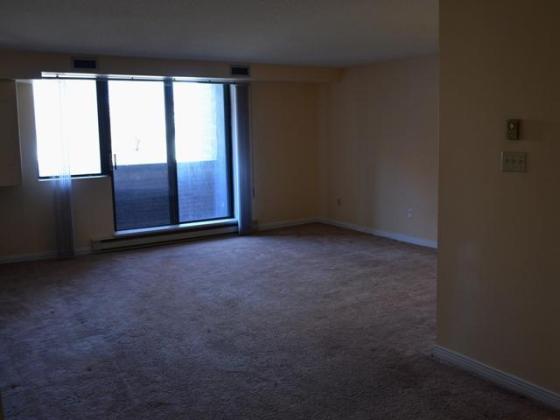
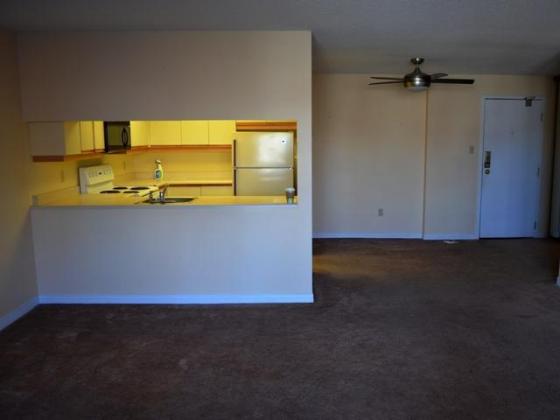
As promised, Here are some before pictures of our apartment. I plan on taking better quality/quantity photos once we move in, but here are the pictures the land used to advertise the apartment online.

1

That’s what you see when you first walk inside. The balcony is going to be awesome to have during spring and summer.

9

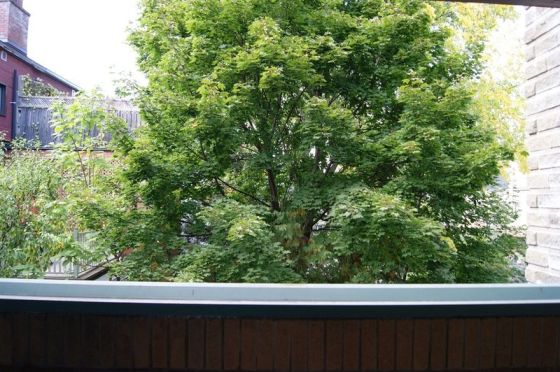
Here’s the view from our balcony. I like that it’s spacious and fairly private. It’s going to be nice to sit out there with a glass of wine and relax at night.

2

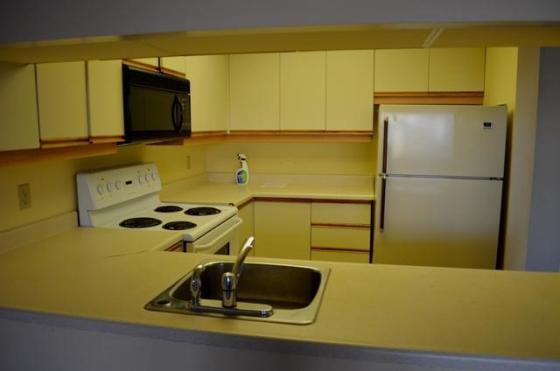
Here’s the view if you’re standing with your back facing the balcony. I love that there’s room to style a little entry way. Not loving the carpet so much, but hey, it really could be worse. The kitchen isn’t the best, it’s not completely updated but it’s fine for us.

3

We have a dishwasher too that can’t be seen. Good amount of counter space. Can’t wait to cook up a storm 🙂 (as if I’m a good cook.. ha.)

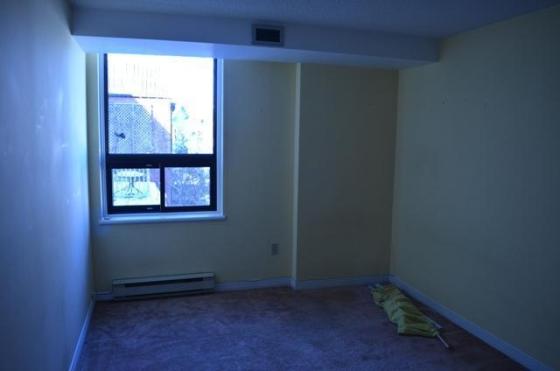
5

That’s the second bedroom which we will use as an office. It is actually quite a bit bigger in person. It also has a pretty big closet that I’m sure will come in handy.

4

Here’s the master bedroom. I literally have this room planned out to a tee. The walls are being painted a light grey. We’re in the process of trying to find an area rug for this space… and a couple throughout the apartment. I’ve had the drapes bought for my bedroom, for when I finally move out, for about 3 years now. eeeeee 🙂

6

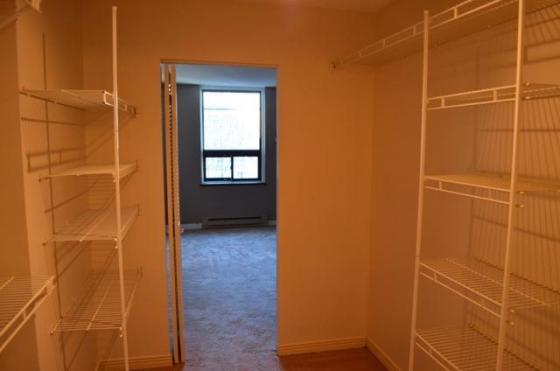
………..And here’s the closet!!!! Holy closet space Batman! Quite possibly my favorite part of the entire apartment.

7

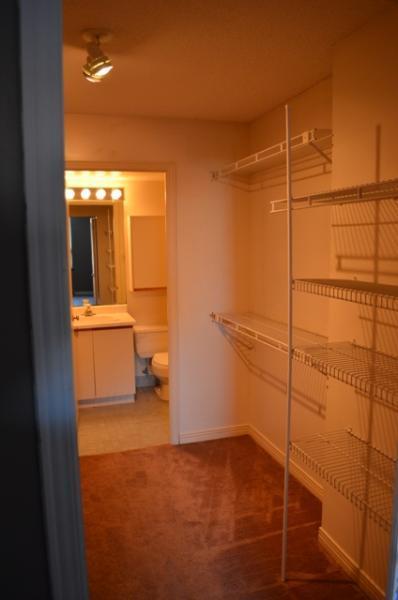
Here’s another strange angle of the closet. Oh ya. It’s huge. I was all giddy when I saw it for the first time. It’s actually bigger than the one I’m currently living in. It leads off into a little bathroom which is pretty sweet.

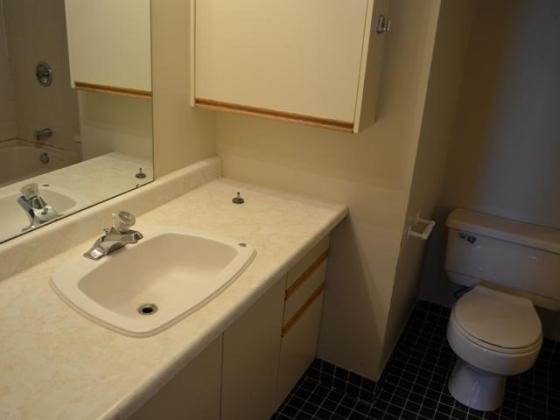
8

Here’s a picture of the main bathroom. It has a full shower/bath which is pretty great. It’s a little on the dated side, but I’m hoping I’ll spruce it up with some awesome decor so that you won’t even notice.

So that’s pretty much it. There are some hallways and more closets in between aswell. The landlord promises to paint everything before we move in, and we’re happy with the colours that we discussed with him beforehand. We do plan to paint some fun accent walls though, but for the most part we won’t be doing any serious paint jobs. We’ll be just a short drive away from both sets of parents, and my older brother is very close to us aswell. We also have friends in the area that we can’t wait to invite over for dinner parties.

In conclusion, I am so excited to move in, I can’t even tell you. It’s going to be great — a decorating adventure. And a huge life changing step. I have a ton of ideas to make it a home and I’ll be documenting them along the way. Stay tunned!

The calm before the storm…

I LOVE MOVING. Said no one. ever.

Okay, I enjoy the idea of moving to a brand new place and I’m comfortable with change, but the process itself really sucks. The only plus size is that you really get to take inventory of the things you have and by doing so edit. Well that is the plan at least.

So as it stands now, I move in 9 days. NINE DAYS!! I’m actually doing pretty well at this point. I have packed all my clothes, except for a select few that I will be wearing until move in. I’ve packed everything else into boxes – pictures, kitchen stuff, plates, dishes, glassware, decor, lamps, etc. etc. etc. Wow, I’m getting exhausted thinking about it. In a nut shell, my life is in boxes right now haha.

I’ve also started the recruitment process of guilting and bribing my friends and family into helping me move. It’s not easy, but the promise of beer and pizza go along way. It really all seems to be coming together… in a chaotic sort of way.

I am starting to get so excited about living downtown and all the fun that comes with that. I’ll be within a five minute walk to my work (boo-ya). And a very short walk to the biward market. Oh, and a five minute walk to my gym! I have very high hopes about getting into shape again. Our apartment is directly across the street from a convenient store. How convenient :). And a block away from a subway (could come in handy in a pinch).

As far as this blog is concerned, it is one of the biggest elements of my excitement. Over the last two years, I have been collecting pictures and documenting my projects, upgrades, goodwill finds, thrifting, etc. and am sooo thrilled at the prospect of blogging about it. It’s something that I’ve wanted to do for quite sometime now. As an avid blog follower myself, after awhile I got to thinking hey, it looks like fun, maybe I should have a go at it. The apartment we found has so much potential, and my boyfriend and I have had mannnny a conversation about how we’d like to fix it up (as much as renters can do).

I’ve had sometime off work, and with that precious time I basically became a furniture-redoing-diy-project-finishing-MACHINE. Over the course of approximately 2 months I’ve redone a desk, table, a double bedframe, 2 captains chairs, 2 patio chairs, a huge shelving unit, a hutch, and a bunch of DIY art. I can honestly say, we have all of the furniture we need to furnish this apartment. And I don’t think there is a piece in the joint that my hand didn’t touch. Which is both empowering and exhausting haha. I cannot wait to share every last project with you — all in good time.

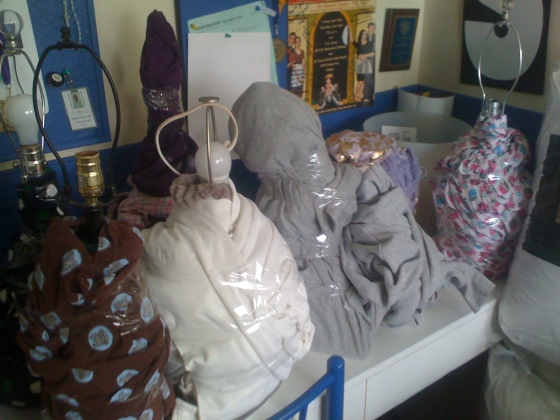
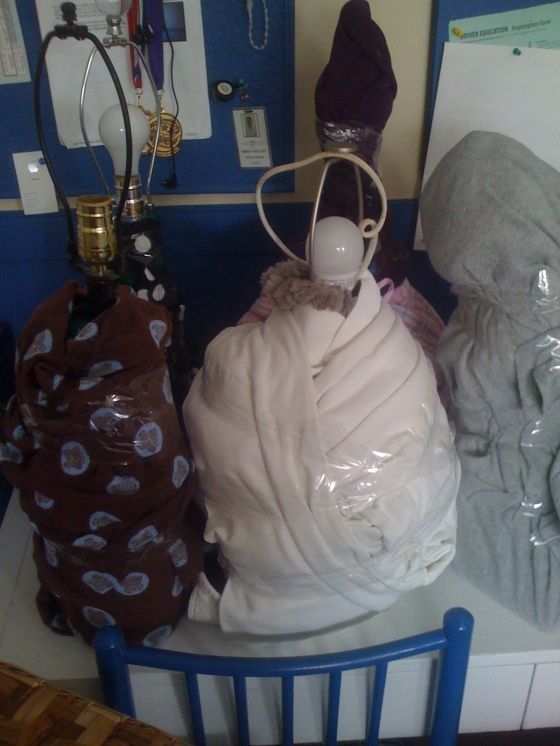
I thought I’d share the chaos that is currently my living/packing nightmare situation. I used my clothing to wrap and protect alot of my breakable stuff like lamps, vases, etc.

Please note: Pj pants being used to wrap lamps haha.

Please note: Pj pants being used to wrap lamps haha.

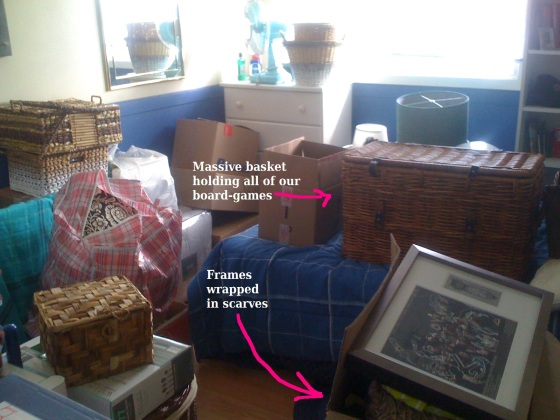
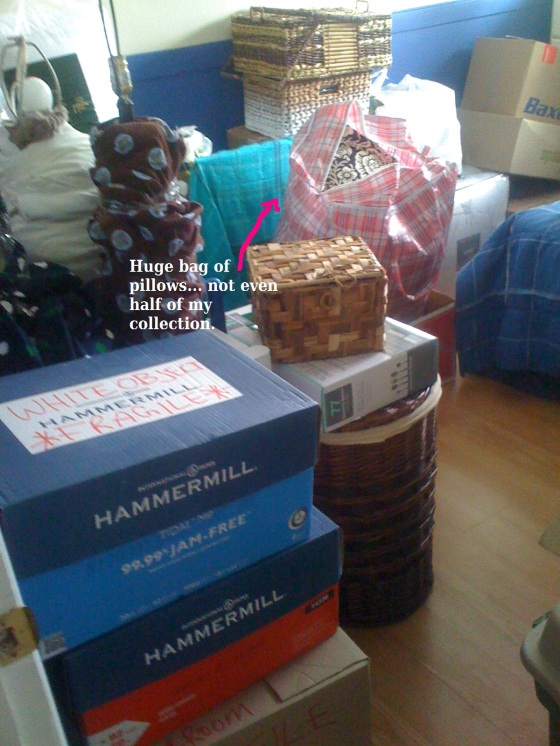
I also have about a million scarves that came in very handy when wrapping pictures.

004

0011

0021

Yep, so those are definitely not all of the boxes, but I don’t want to spoil any future posts with sneak-peeks just yet. Anyway, I’m very excited and happy and exhausted… and excited. Did I say excited? I am curious if any of you have moved recently or have some major tips to lend. What worked for you and what did you wish you knew?

**New apartment “before pictures” soon to come***